3 Golden Farts.

A friend of mine asked me “what are the three golden rules of cinematography”. An unanswerable question? Absolutely. Here goes….

Cinematography as far as I'm concerned, is the art of capturing video that effectively and intelligently tells a story. A story as far as I'm concerned, is the ability to communicate a sequence of events that are coherent and cumulative in their effectiveness of telling the said story. Put more bluntly, cinematography plays a huge role in manipulating the viewer to think or feel a certain way using moving images.

So, unlike photography, which is a single frame / moment in time, cinematography is a sequence of frames that describe of period of time.

With that said, you could film an entire story with one video shot! Keep in mind though, that video is typically / literally, 25 "shots" per second (in Australia).

The reason I attempted to explain the above, is that when talking about what makes good cinematography, in my opinion, it involves not only HOW the image is captured (what makes it engaging / beautiful to look at), but also WHAT is captured and how it flows from one thing to the next. Both are important aspects when telling a story using video, but for this lecture, we'll focus on the technical aspects of HOW to make good cinematography. Or worse, we'll focus on how to make a single "shot" look good.

[ There are in total 4,356 golden rules. Below are 3 ]

Rule No. 1

How can we entice a viewer to look at our screen?

Movement + Light

Animals predominantly use sight to discern what is in front of them, which plays a huge role in whether or not they should pay attention to it. Illumination (think Minions) is what makes sight possible. Movement is another major component, hence why video is a powerful story telling tool. A screen, with Movement + Light, are the reasons we look anywhere on that screen at all. Knowing this means that we can essentially control where someone looks.

Sight relies heavily on two things - brightness and literal focus / sharpness. Metaphorically, they are the same thing, but you could say that in order to draw the viewers focus, you really only need light. A blurry ball on a black screen is what someone will look at, even if it's blurry.

A blurry ball and a sharp ball on a screen? Well, if the blurry ball is brighter than the sharp ball, it will get looked at first.

A blurry stationary ball, a sharp stationary ball and a moving ball either sharp or blurry? The moving ball gets looked at first, so long as it’s bright enough (think T-Rex). We could do some more, but I think you get the point.

So now that we know how to force someone to look somewhere on a screen...the rest is easy!! Just pick or pack movement, focus and brightness and you're done!!!

Rule No. 2

How can we make that screen look good?

Lighting

Lighting is different to what we just talked about. Lighting is the dark (confusing I know) art of how to apply rule No. 1, AND make it look good. So what looks good? This is the problem. You could say that what looks good is subjective....but it's not. Sorry. What looks "good" is the same for everyone (think attractive woman / man).

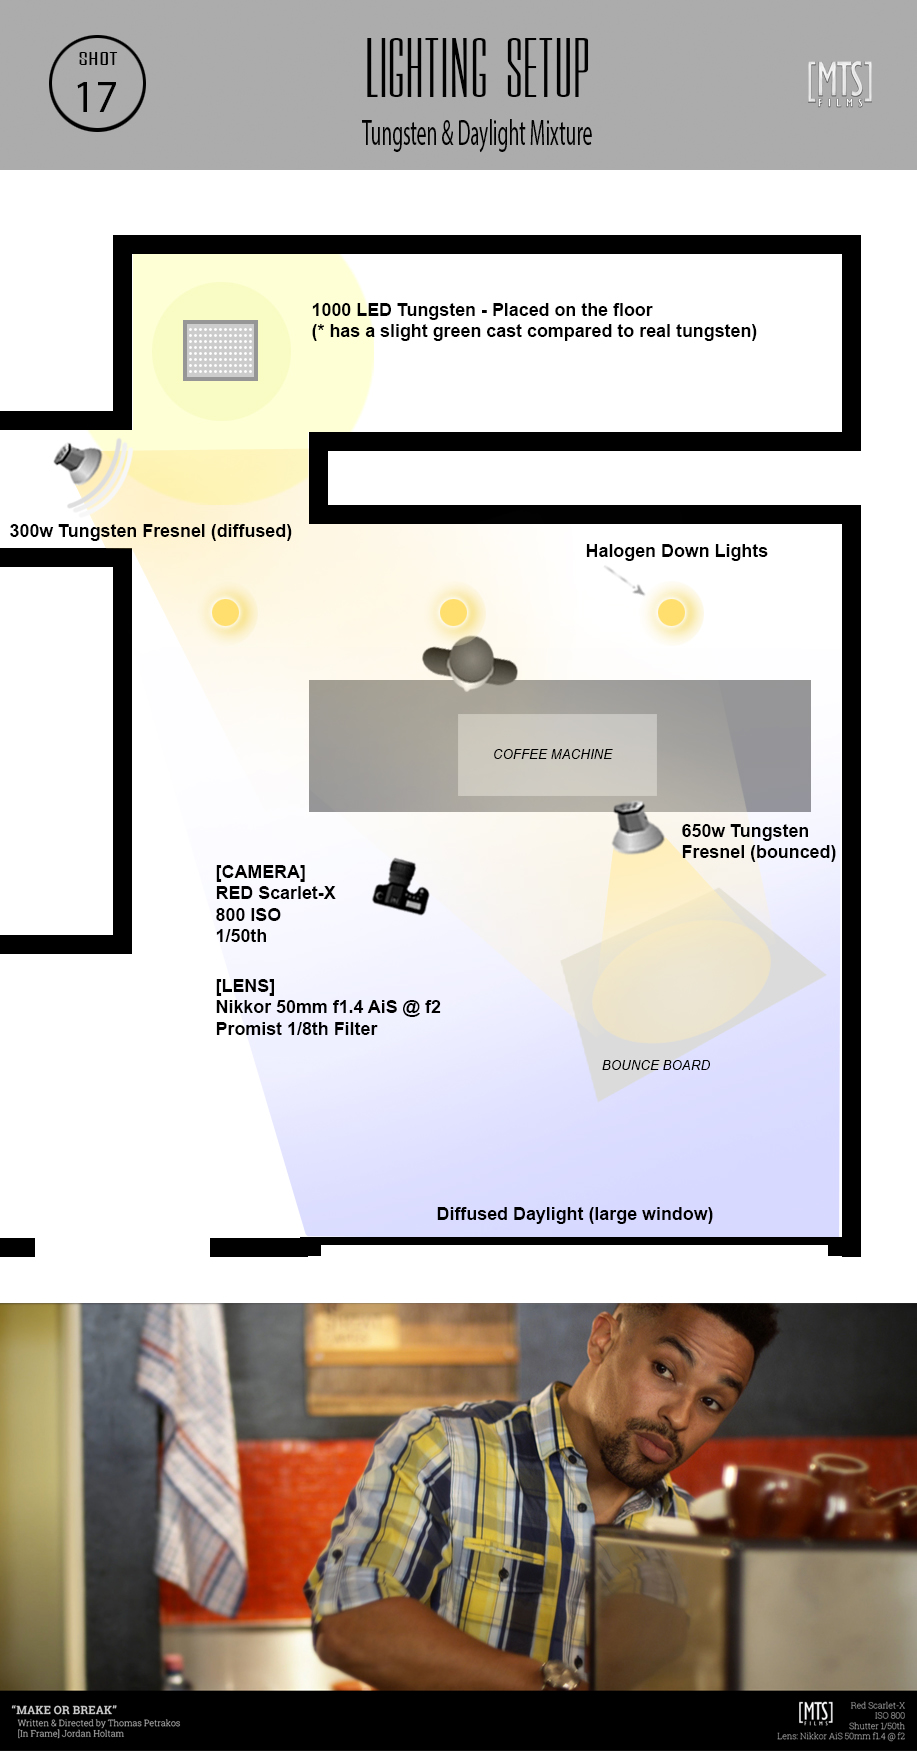
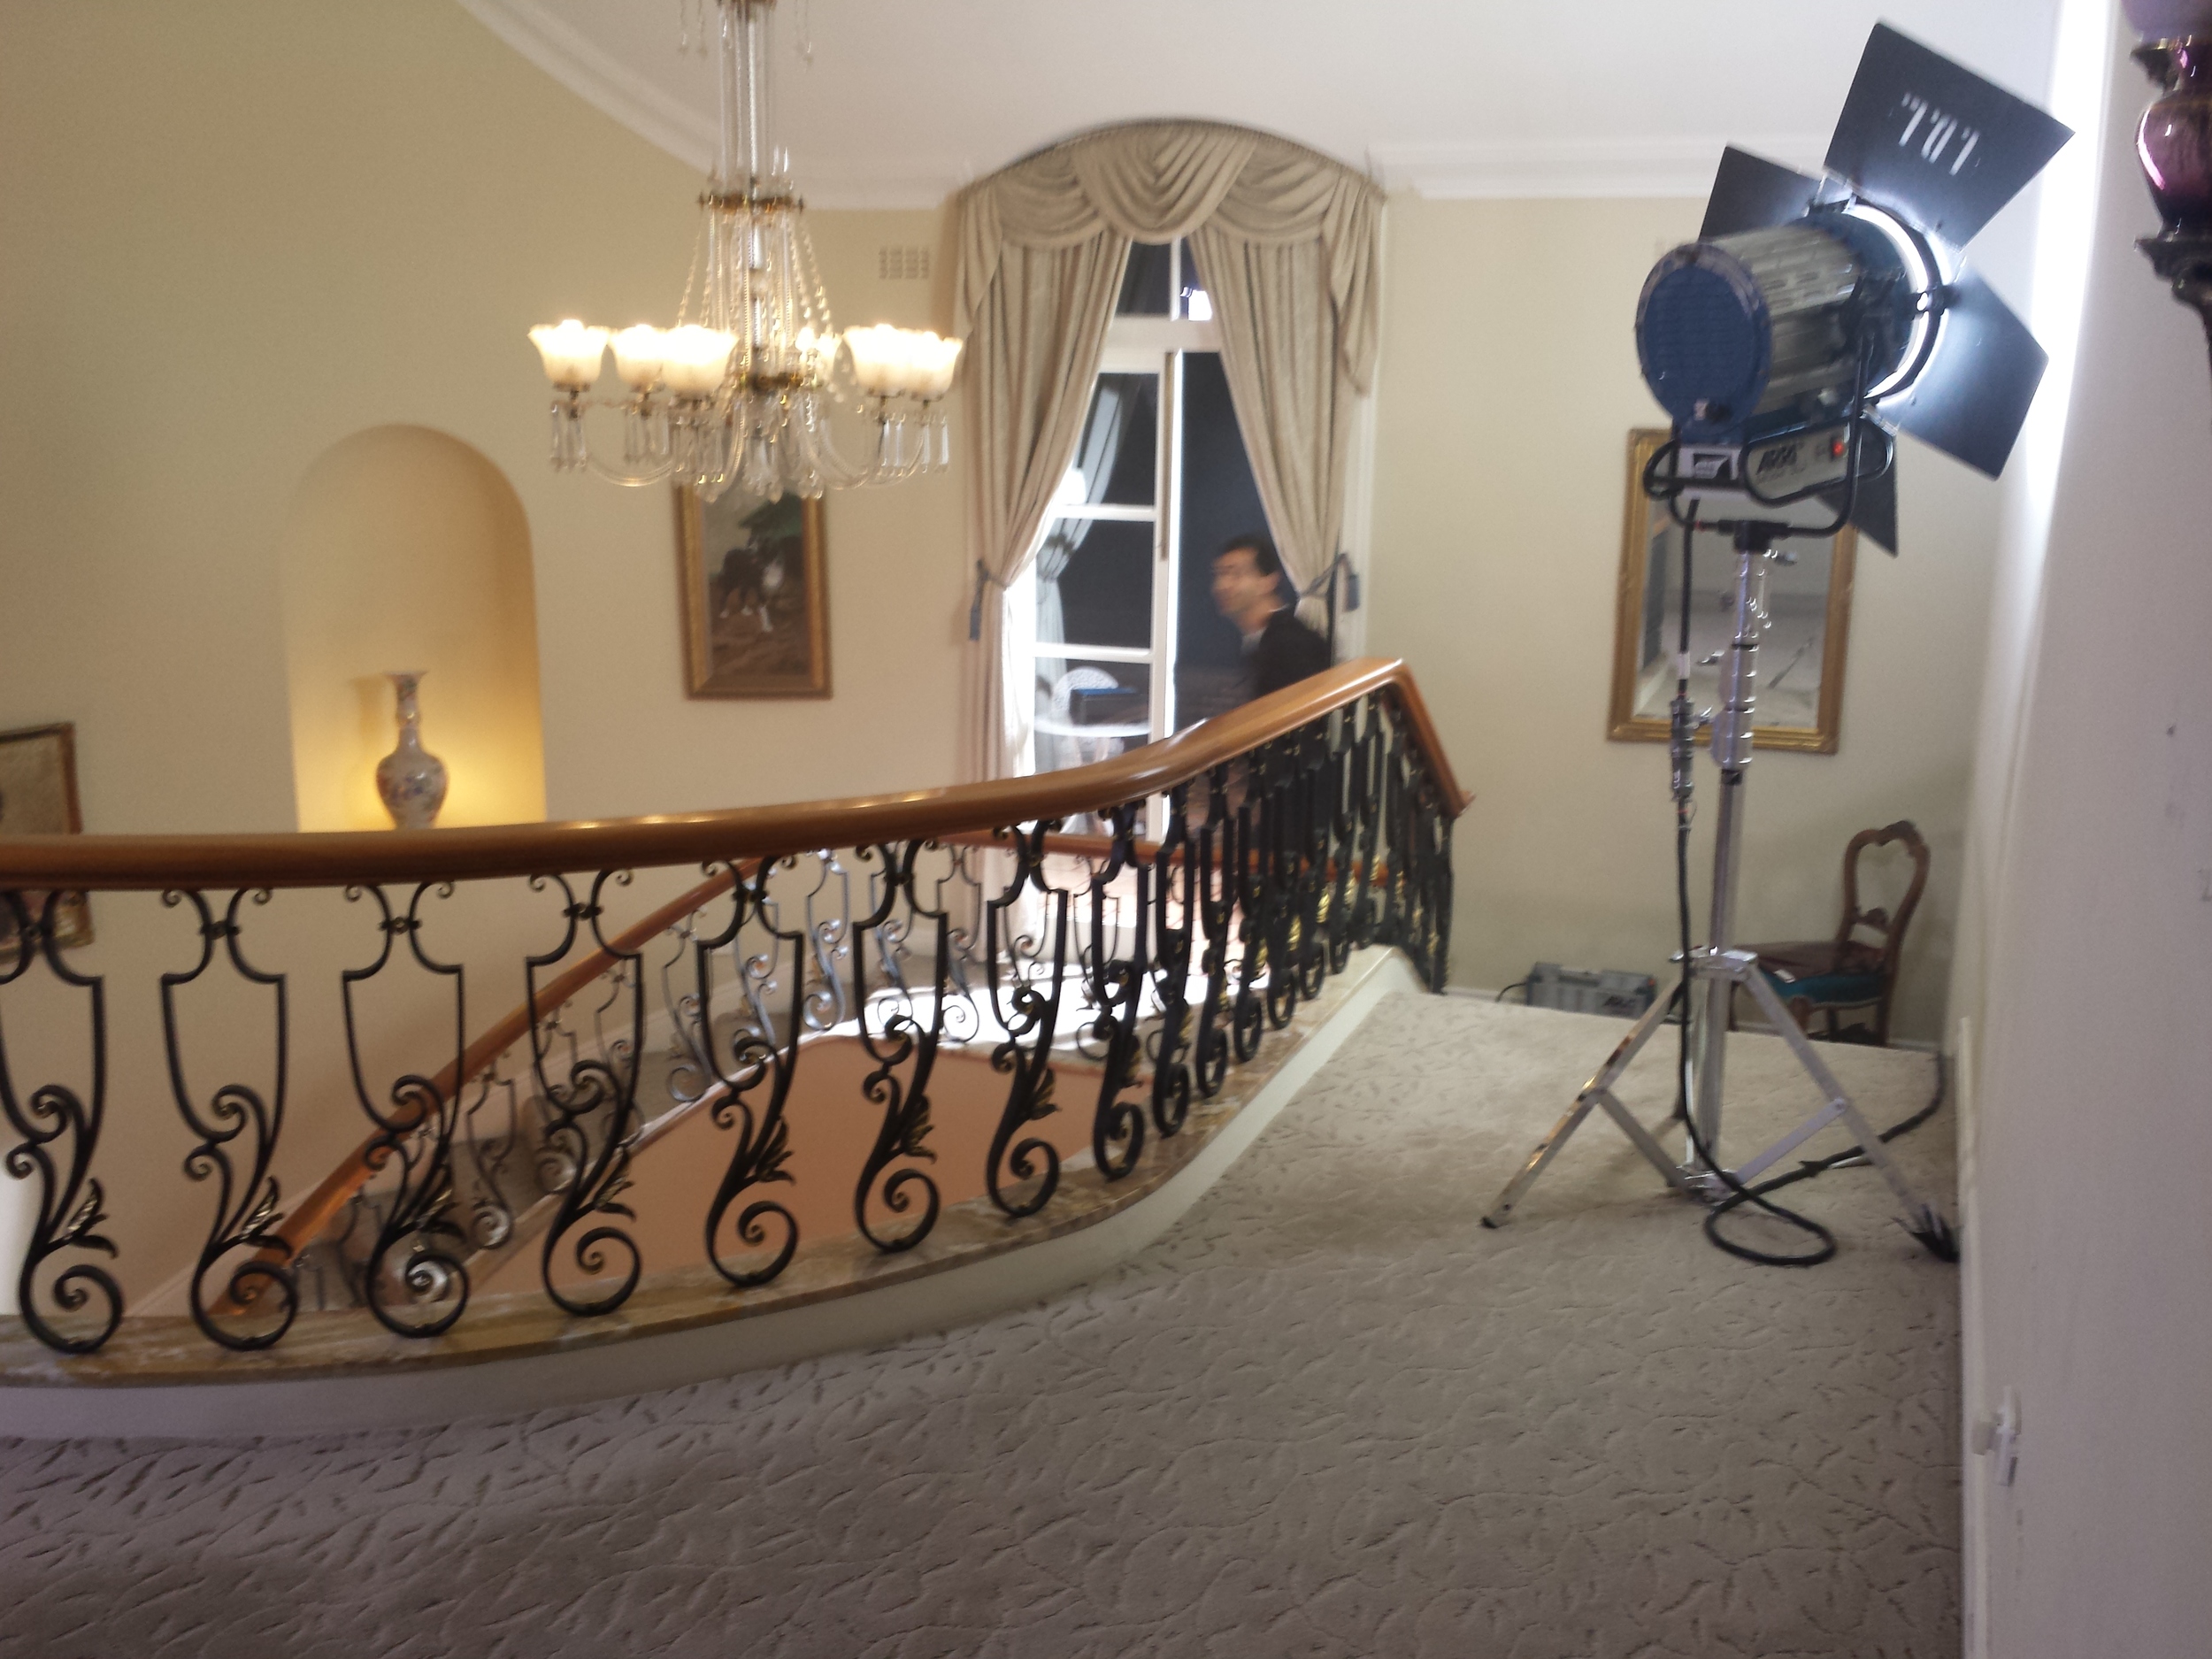
There are many "rules" on how to "light" a scene the "right" way. Google it, and you'll no doubt come across "3 point lighting". Honestly, it's a good start. A key-light, a fill-light and a back-light. These three lights help give dimension to a shot...remembering that we are working with a 2D screen. We want it to appear 3D so that it is more engaging. To do this, we need to create depth. 3-point lighting helps create depth. Remember when you were learning to draw and you inevitably had to figure out "shading"? Well, that's depth. That's what turns a 2D image into 3D. That's what 3 point lighting ensures.

Of course, there are subtleties and nuances at play that can make an image sing beautifully, or lack luster. This comes down to practice and training your eye to be critical of "what looks good". I suggest separating the three lights and working on one at a time. In my experience, you can get away with a single light....a back light. If that's not working, add a key....or some fill, or both. You can apply this practice to a landscape or a portrait - using the sun, studio lights or a desk lamp.

Rule No. 3

Balancing the frame, forcing a feeling.

Composition

What is good composition? What IS composition?

The fact is, you've got a space to fill. It's a rectangle. You've mastered lighting, focus and movement - you know where you want people look and how to make what they're looking at, look good. But what about how the things you're making them look at are positioned within the rectangle? Does that make a difference?

Sure it does. If your shot is a profile shot of someone looking left, and their nose is almost touching the left hand side of the rectangle (screen), especially whilst the right hand side of the rectangle is empty (negative space)....well, that's gonna make your viewer feel off. Something is off. The composition is not balanced. The viewer feels something. The viewer wants to see what is beyond the left hand side of the screen! Will you show them? That is a powerful place to be...

This is the beauty of composition. You can use is it to MAKE your viewer feel something, and then resolve, or not, that feeling. Even if no words are spoken and no music is played. It is a complex topic, but with practice it is easily and quickly learned (unlike lighting). Is your subject close or far from the camera? This makes the viewer feel different. Is your subject looking at the lens (breaking the fourth wall)? This makes your viewer feel a certain way. Is your subject towering over the camera or looking up from below? How is your subject moving within the frame? What images will you show them next and how are they arranged compositionally?

Like I said, it's a complex topic and starts to head into the realm of psychology. Not to sound snooty about the whole thing, but I guess at this point it's not just about light and focus, but how people respond to certain images and how they are arranged.

The rule of thirds, the golden ratio, yada, yada, yada (think Seinfeld). Again, it's like 3 point lighting. Start there and explore.

FINAL THOUGHTS

Because learning what good cinematography is requires a lot of thought and practice...failure and luck.

First thing is hit record. Second thing is to look at what you recorded and be critical. Be honest. Is it doing what I wanted it to do? Is the magic of cinema working? If not, try again. Add some music, dialogue, an epic story, character arcs, a turning point, a resolve and an all encompassing conclusion that leaves a viewer feeling like thy didn't waste their time watching your rectangle.

Orrrr.....flip the rectangle on it's side and make 10 second video that has a sexy person or cat on screen doing something engaging and upload to TikTok.
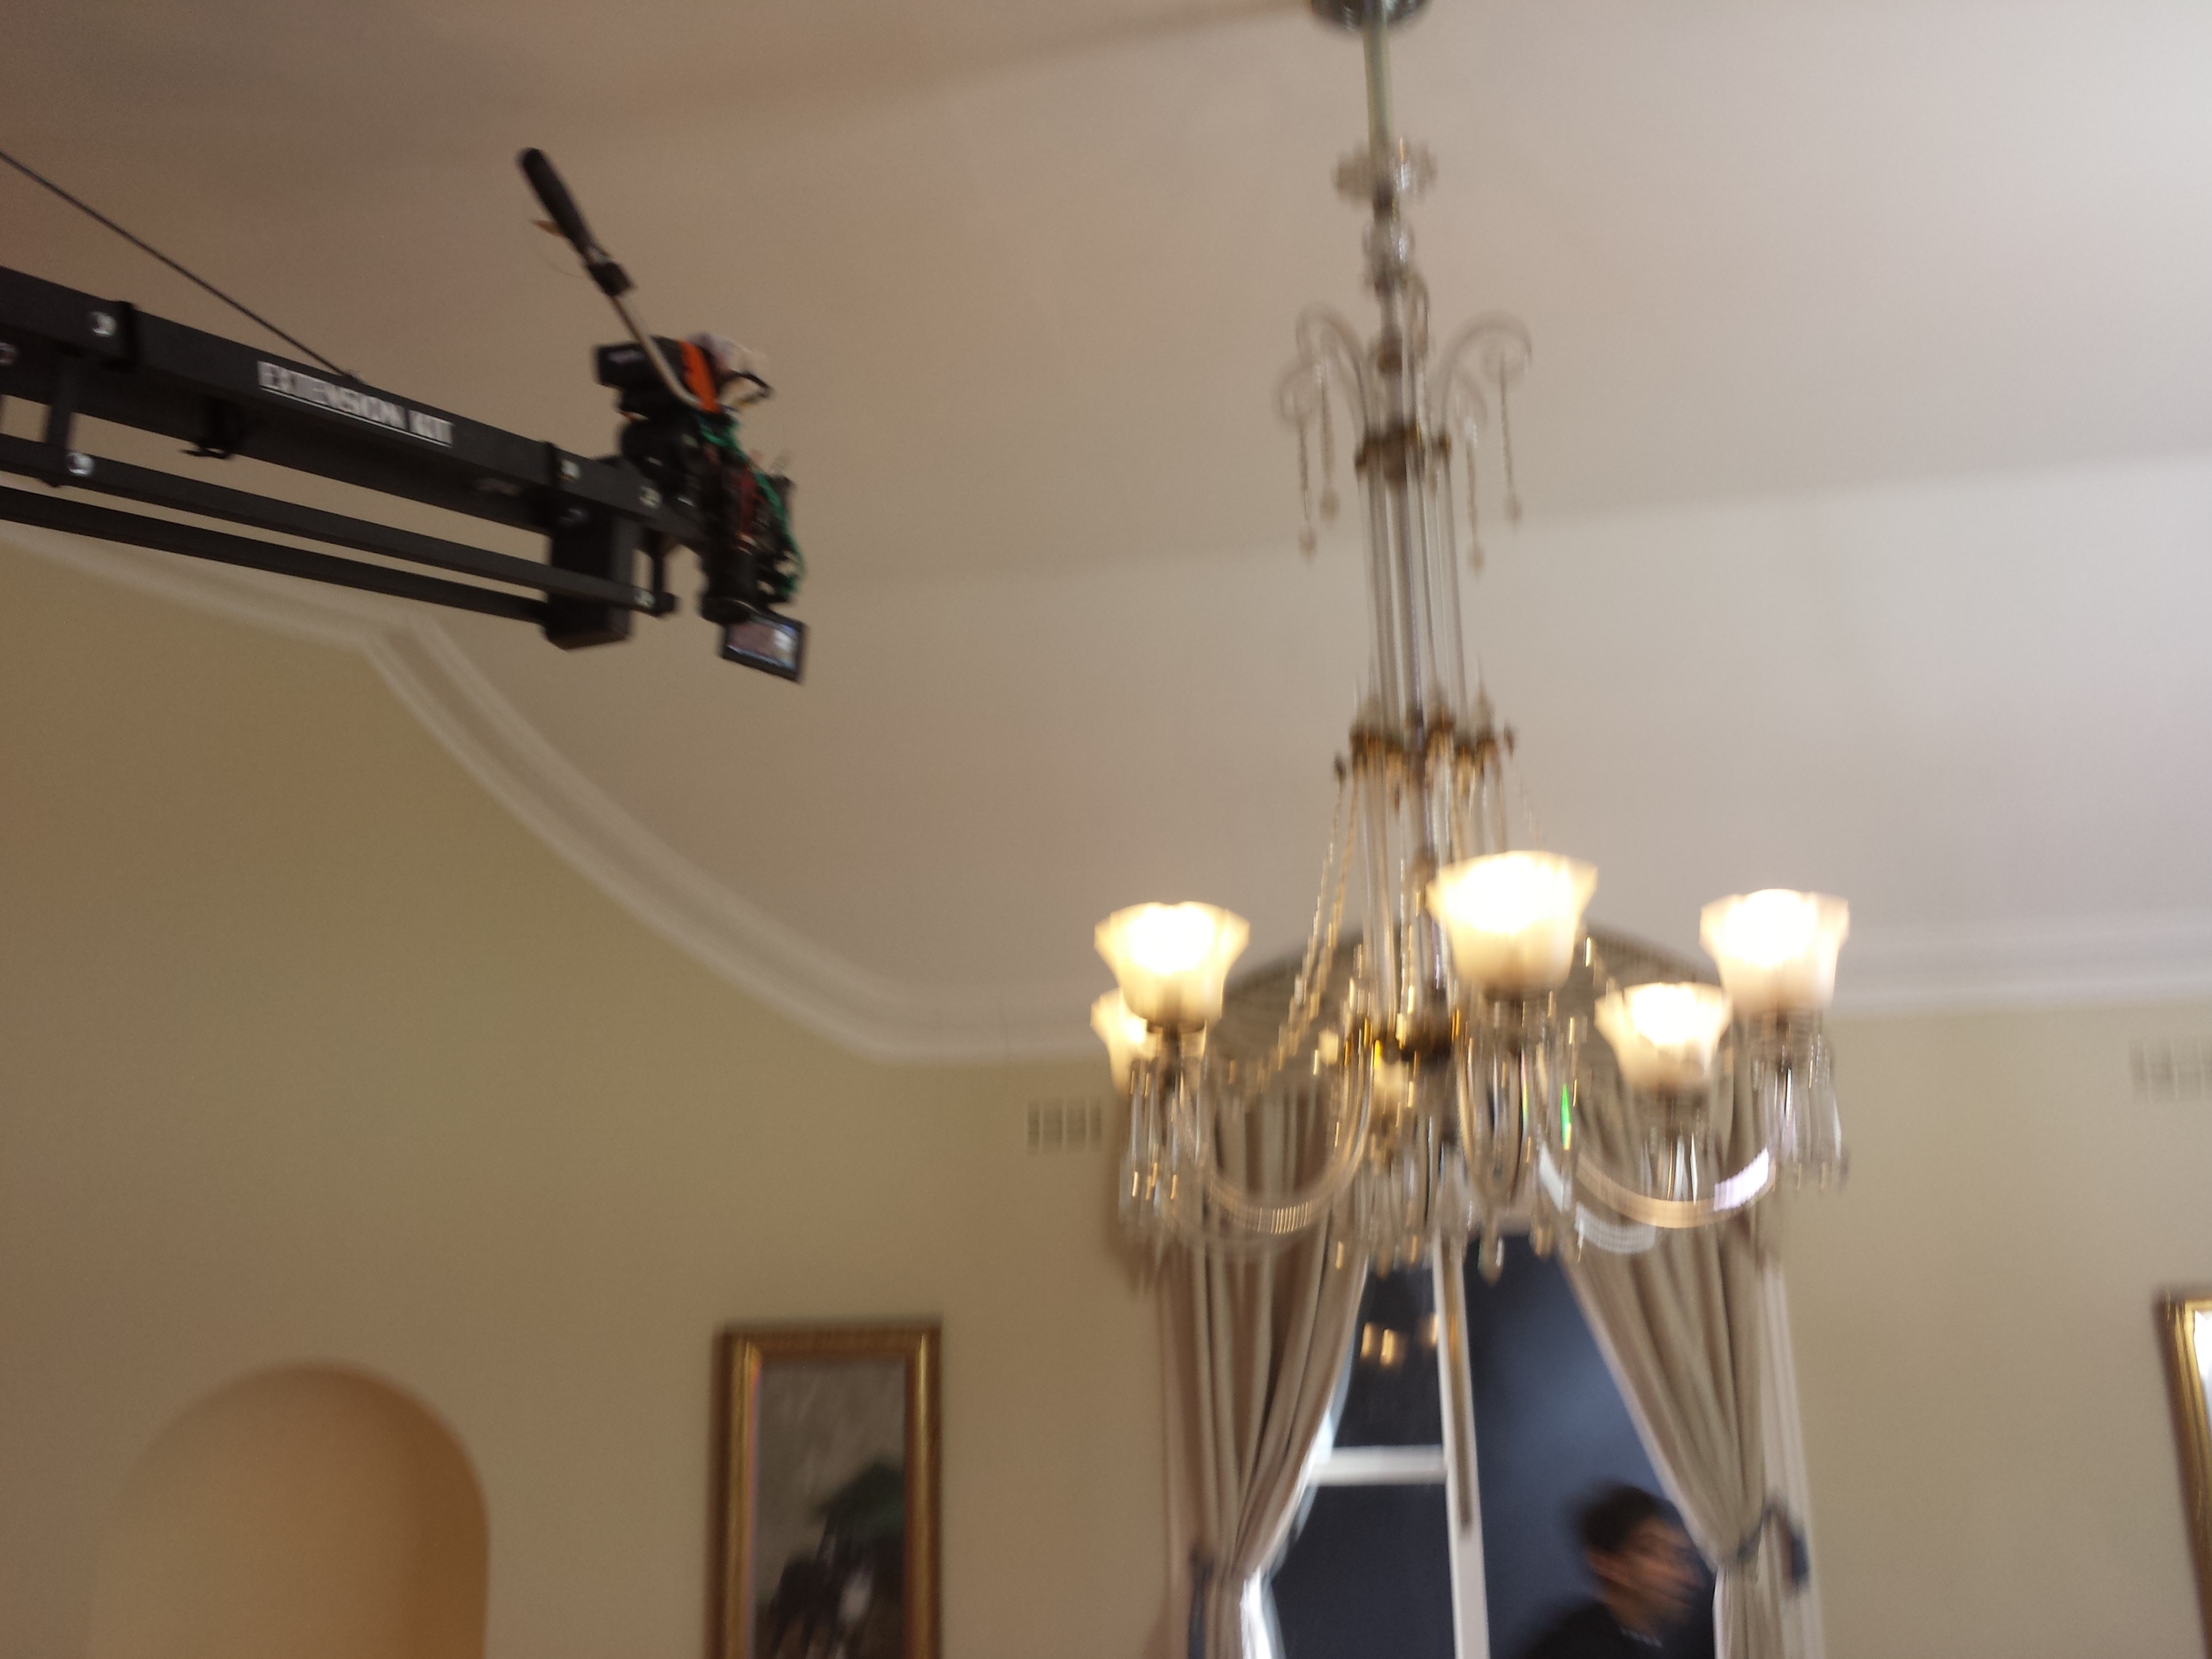
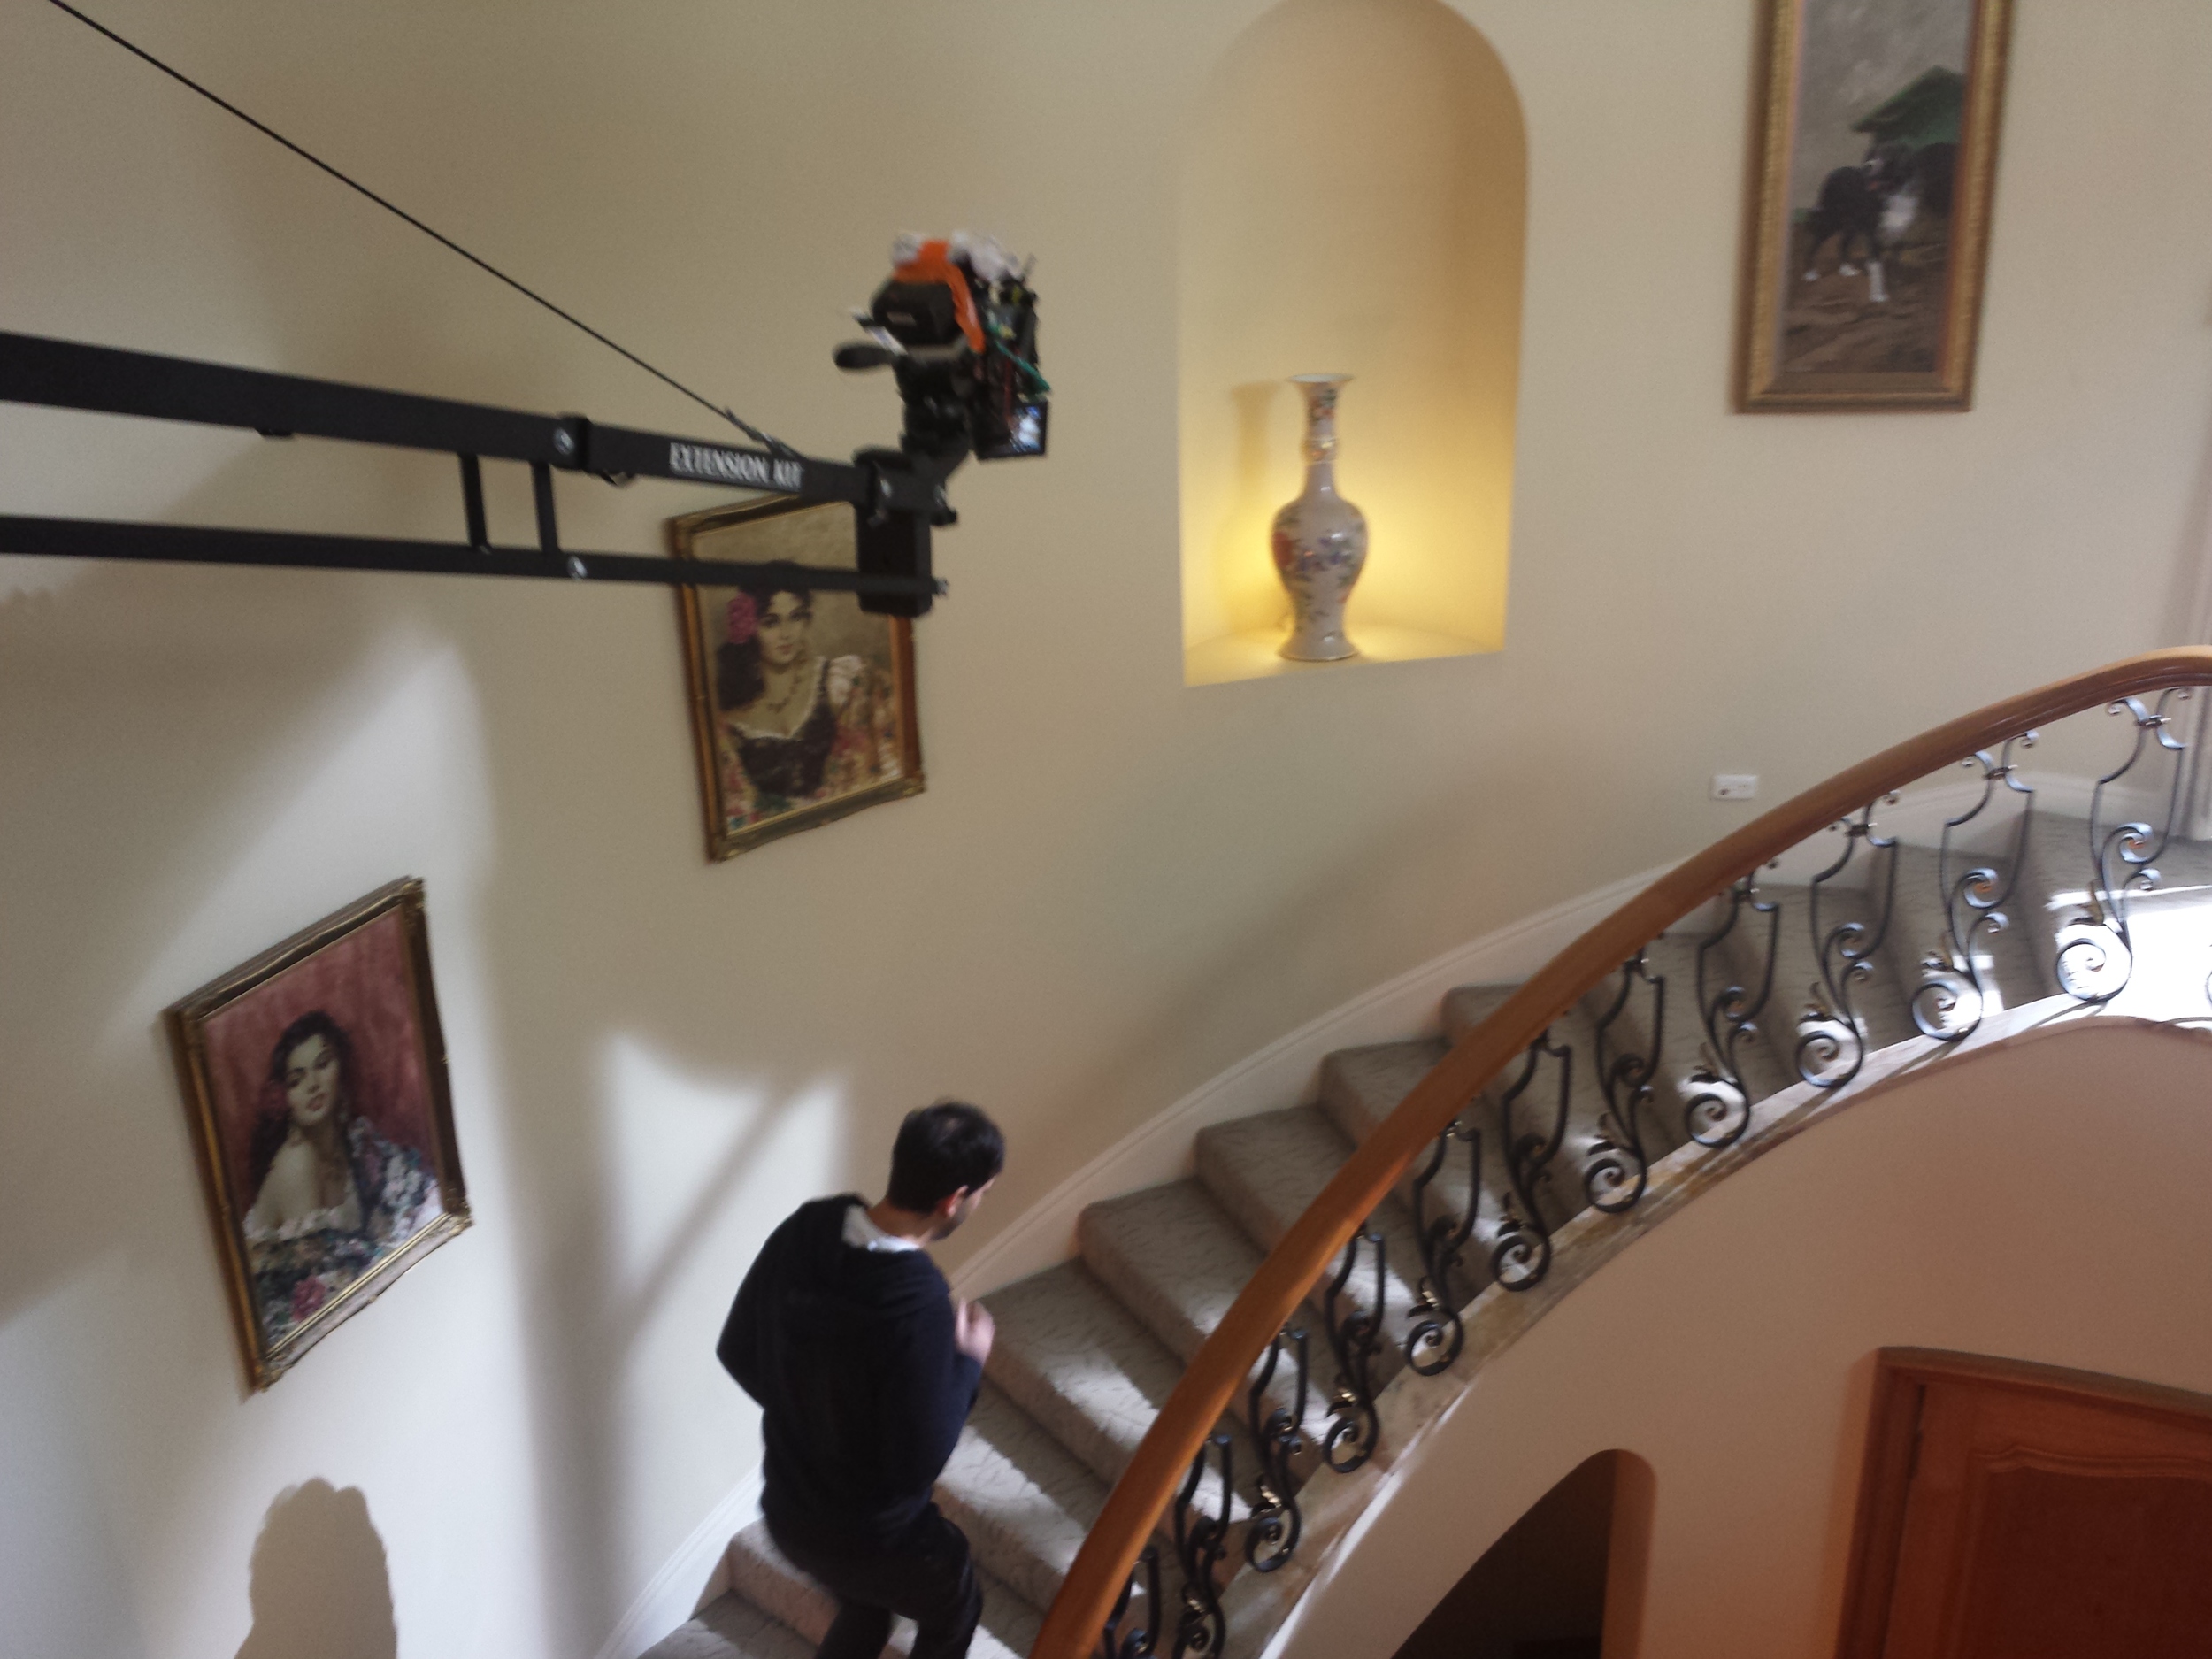
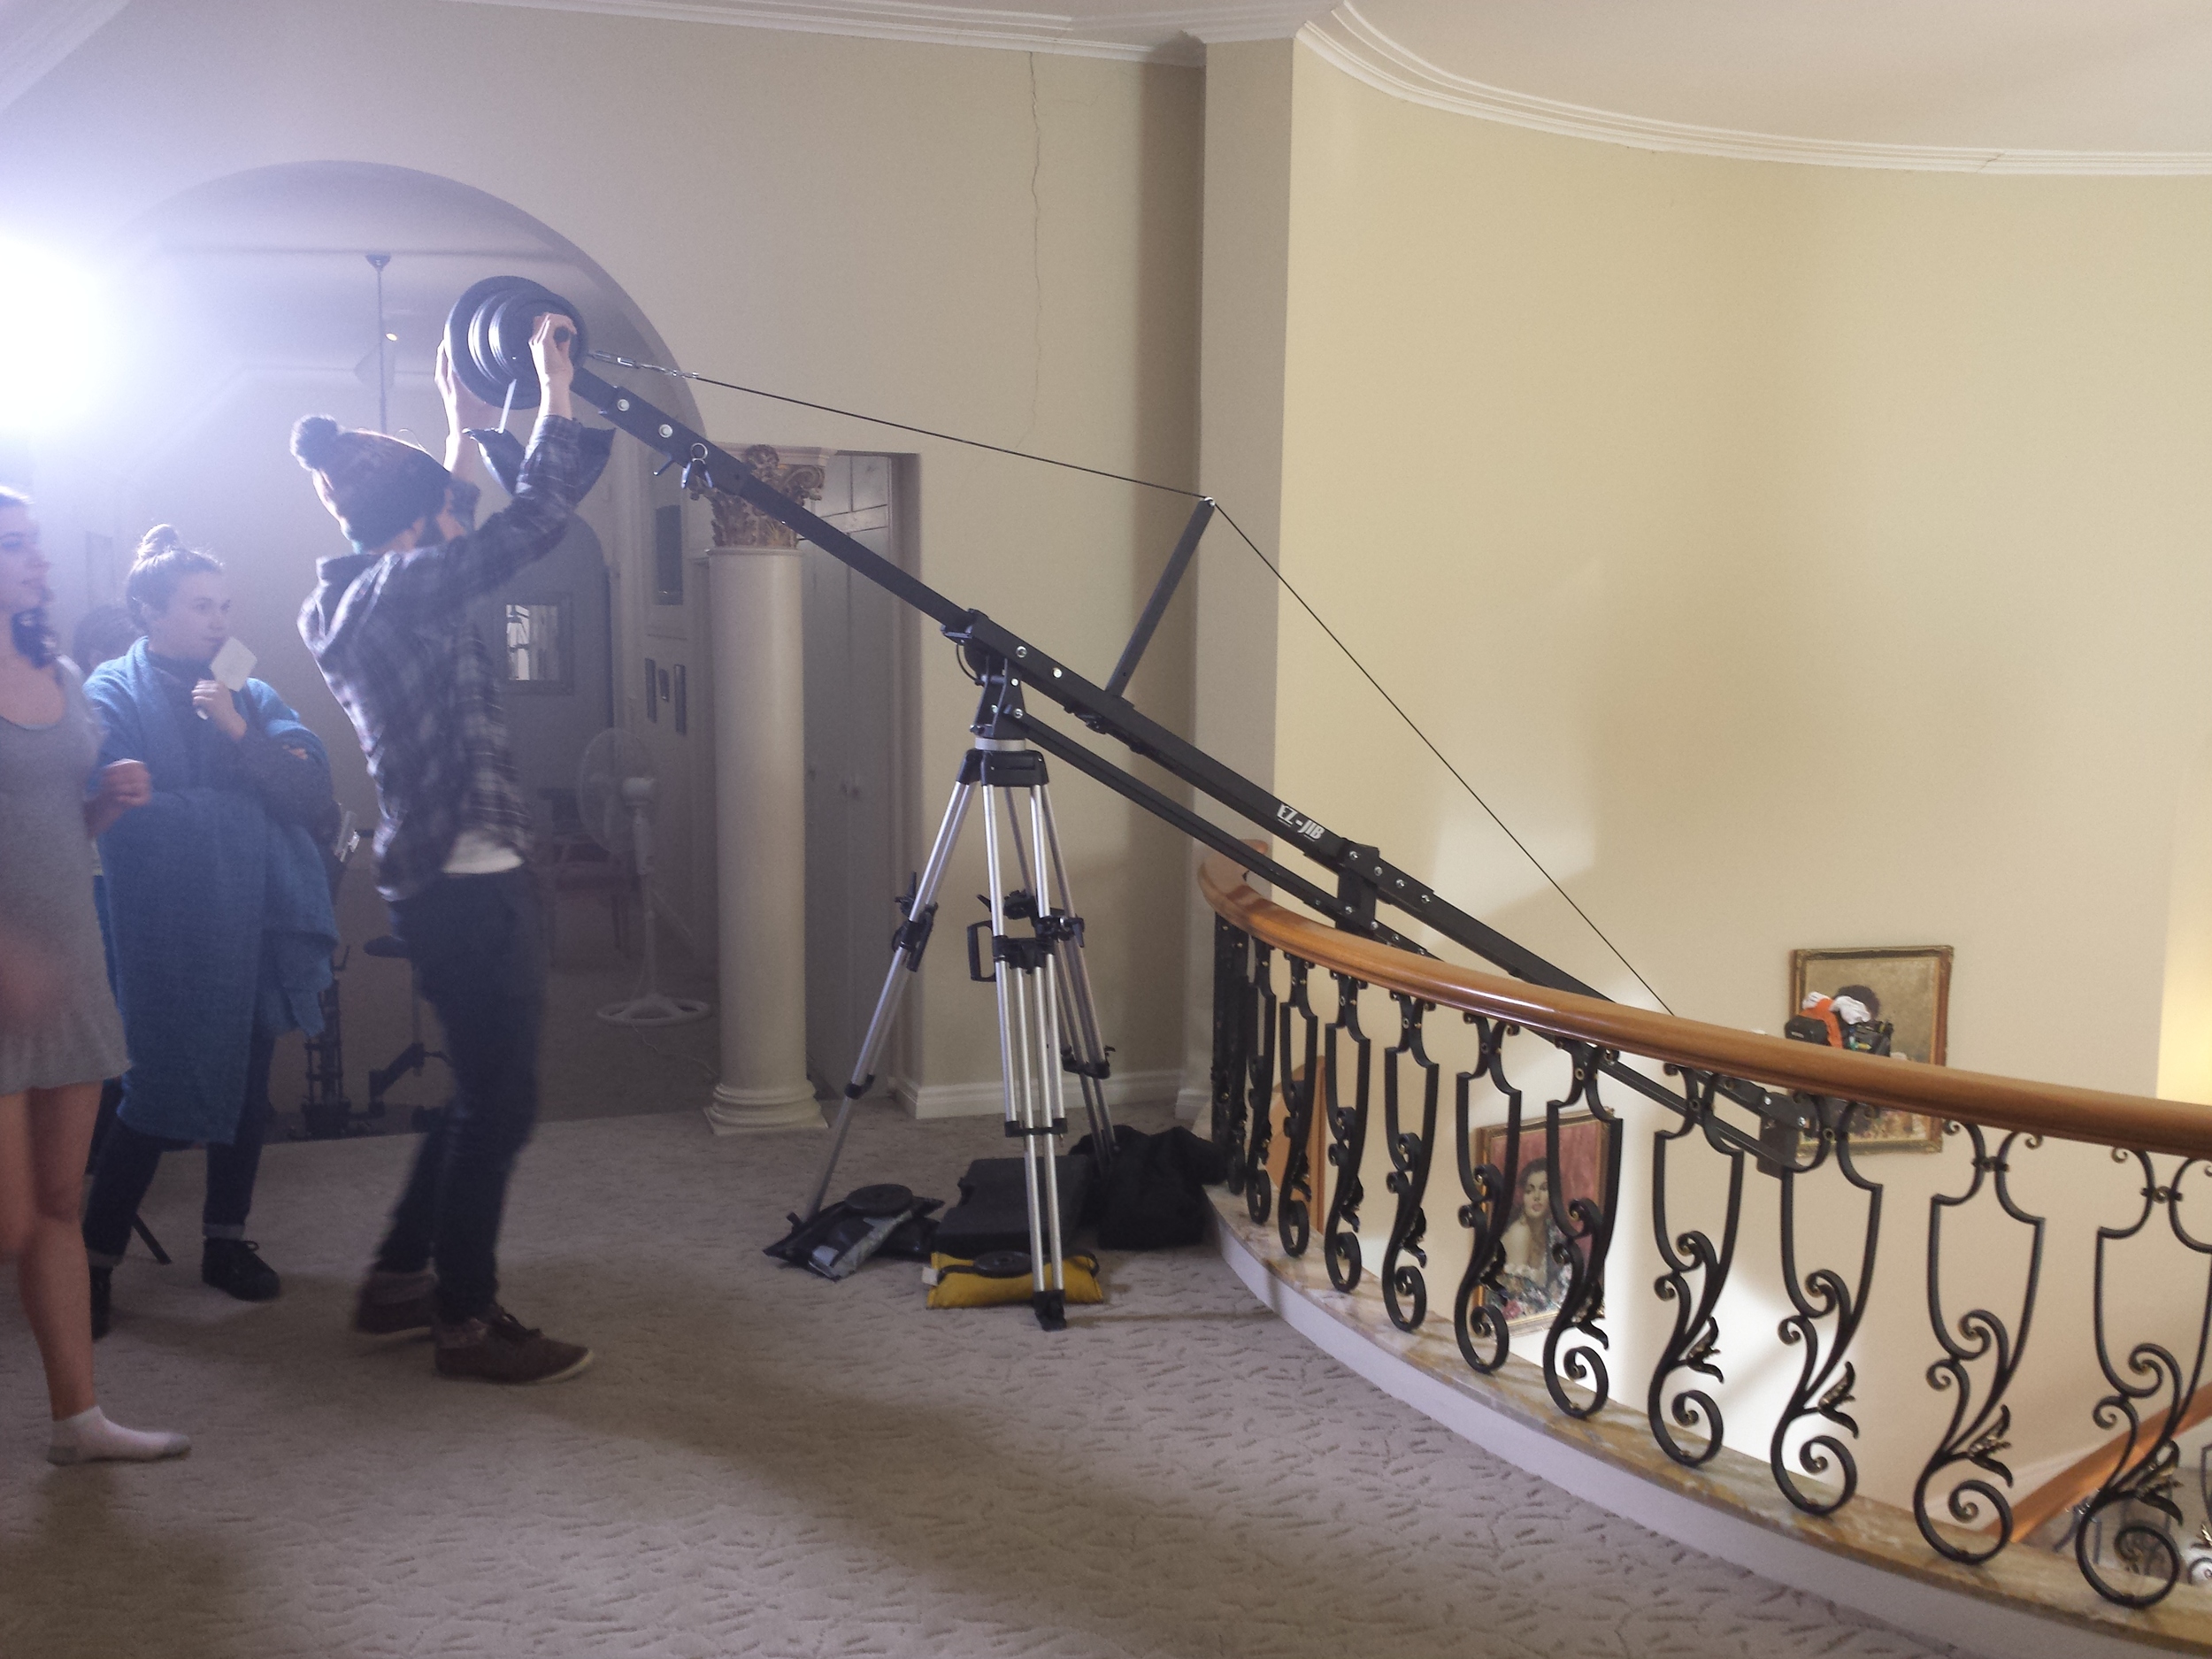
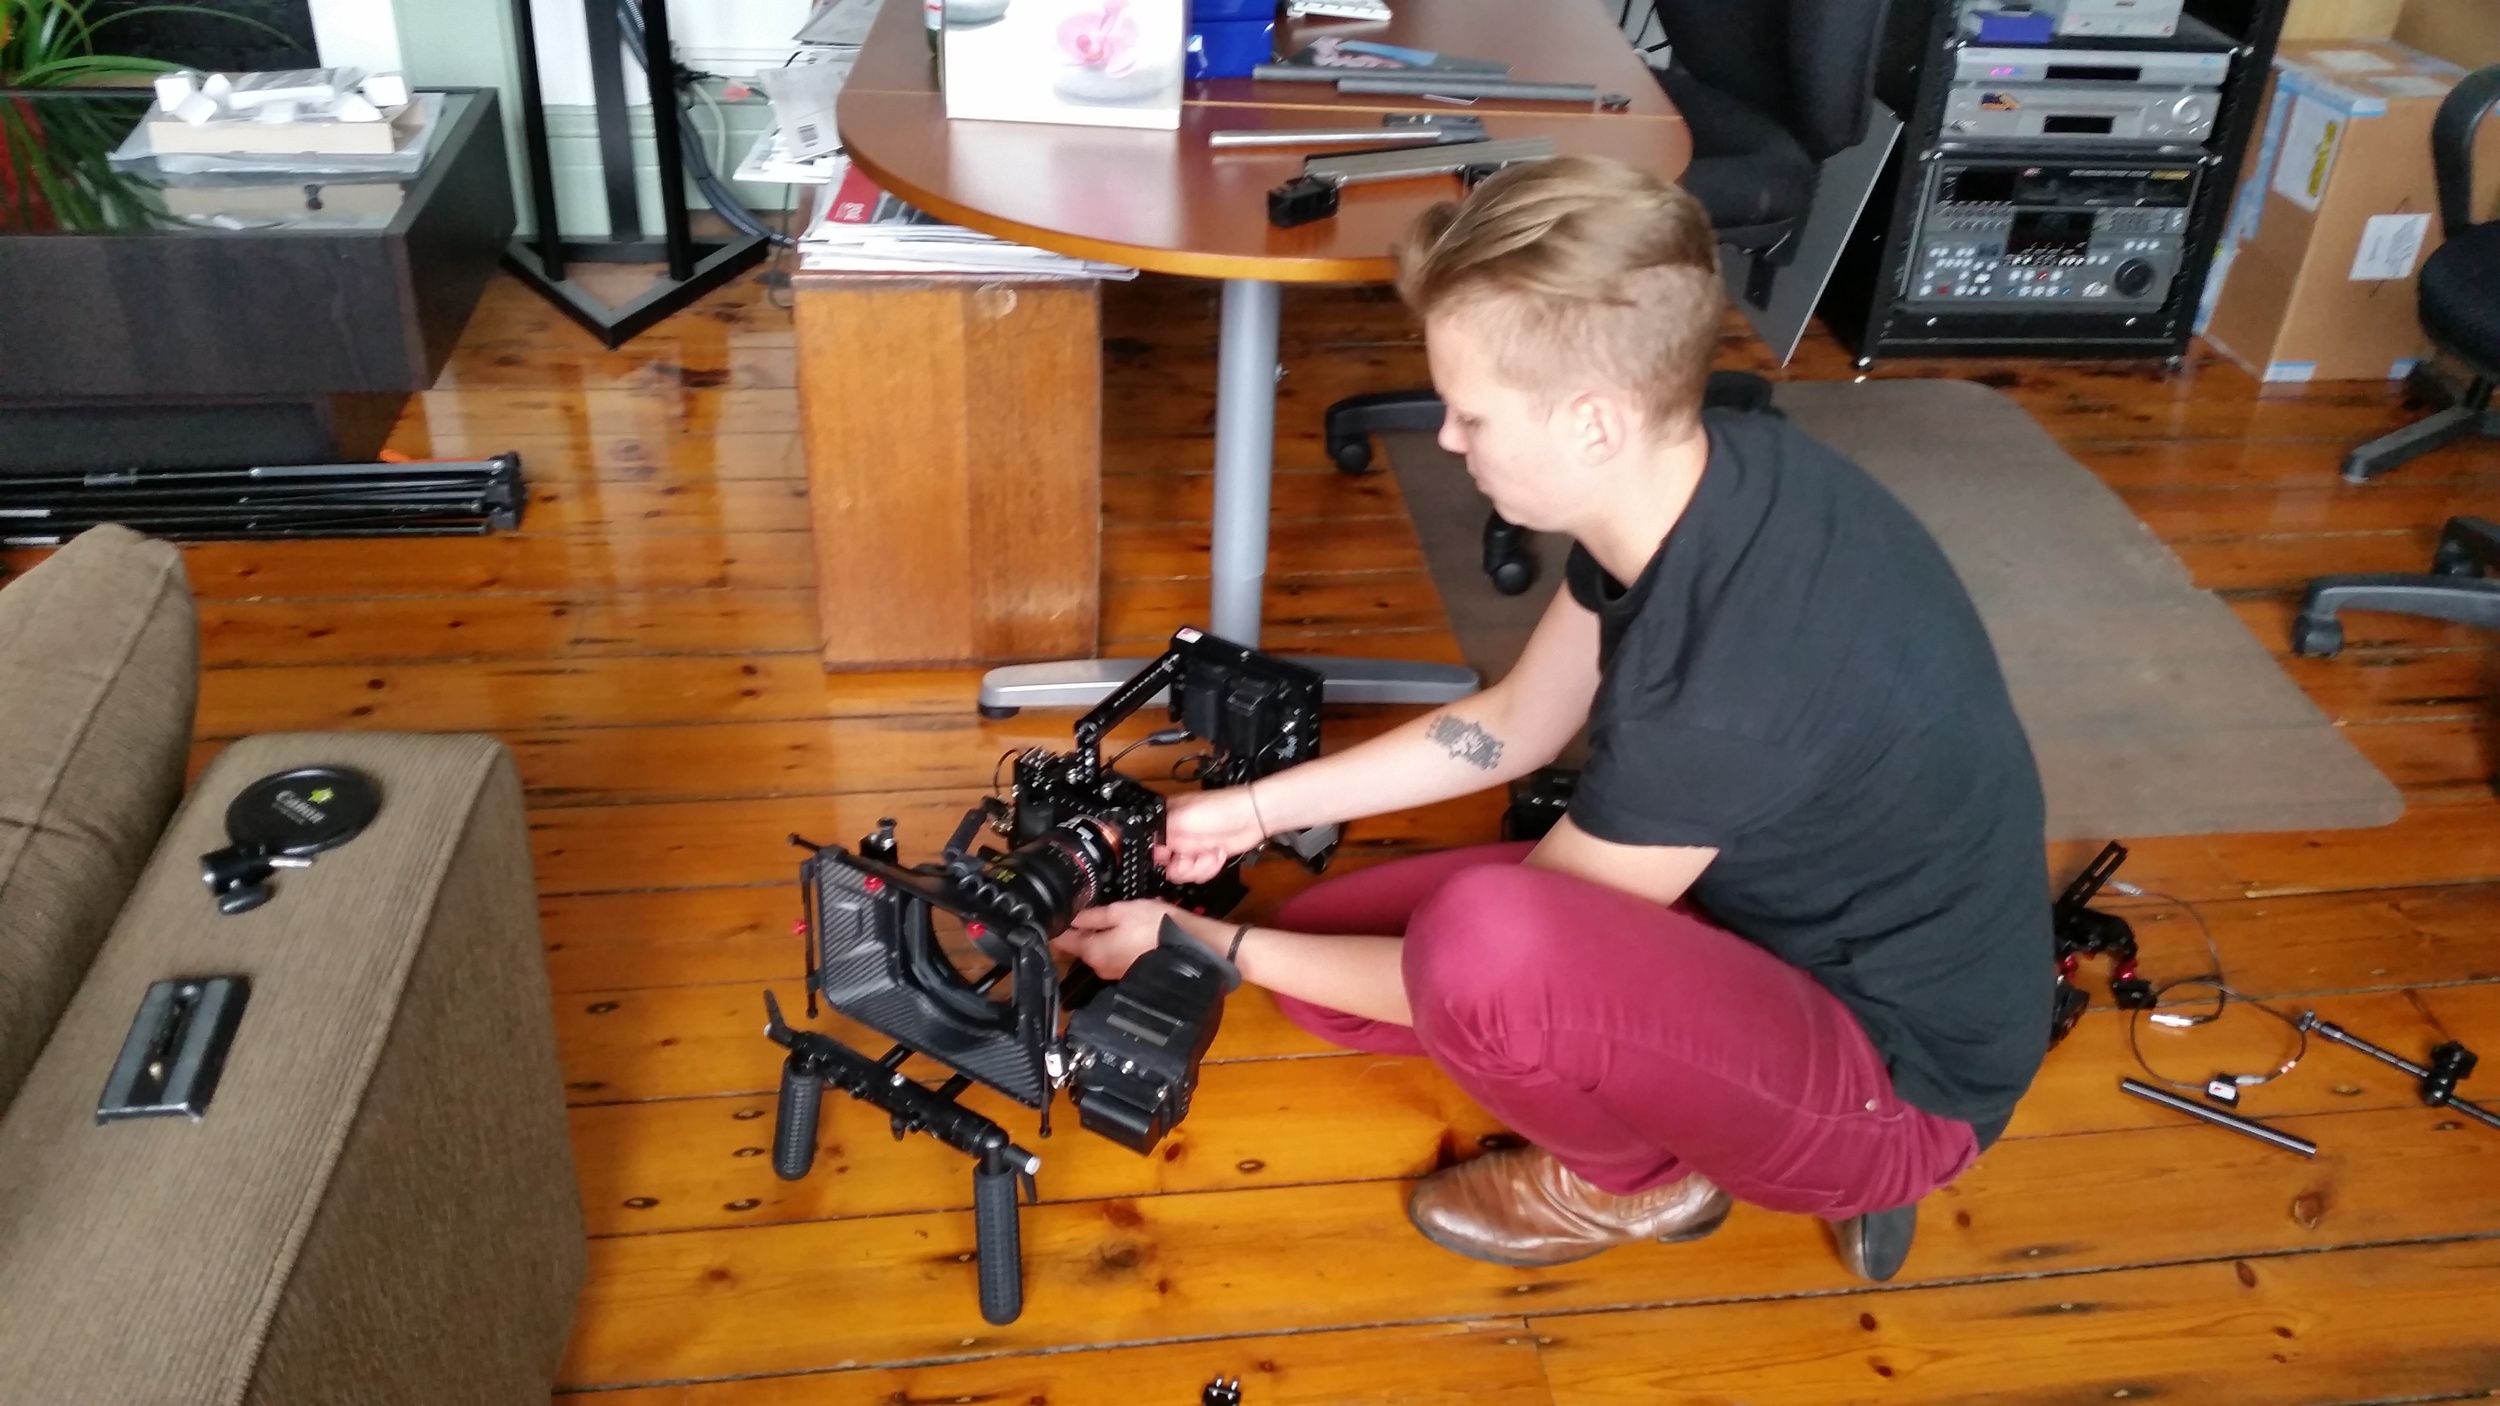
Posted on December 20, 2023 .

Dad Lyfe and Turning 40

So, you’ve probably noticed (or this is your first visit) that I don’t write blog articles anymore. There are a number of reasons why that is, but most of those reasons are positive ones :) First of all, I REALLY appreciate the wonderful response I’ve had over the years from my readers. Many of my mornings have been met by an email from you, filled with kind words, interesting thoughts and challenging questions. Those emails have made a difference to my life, so thank you! I never thought this blog and it’s rambles would reach so many people.

Meanwhile, as I continue to master my craft/s and navigate this tricky industry I’m also putting energy into raising a family with my beautiful wife. We are (almost) two kids in now and just loving it :)

So, I guess this little note is just to let you know, new subscriber, that I’m not sure it’s worth subscribing anymore! I’ll keep the site as it is but I don’t plan on adding anything new in the future. If you’d like to see what I get up to, I do share occasional bits on my Instagram (@mtsfilms) and finished pieces an my Vimeo account.

Thanks for stopping by!

Matt

Archer.jpg
Posted on April 20, 2021 .

Look Hard (enjoy later)

The above video is a lazy new edition to my, original, “The Cinematography Of…” breakdowns. I’ve always over-analysed things. It’s a burden sometimes, but I’m just a super curious guy. I find myself distracted when watching a movie for the first time (and second, third, fourth and fifth times hehe) because I’m assessing what lens might have been used, how the highlights were handled, why a shooting style was chosen and how that might affect the feeling of the scene…etc, etc, etc…it often means I don’t even get to watch the movie as a form of entertainment - It literally becomes a study. I do this too, with commercials and I learn SO MUCH! Even if half of what I “assess” is totally wrong, it’s still empowering to break a masterpiece down into it’s parts and appreciate them.

Do you have to ability to watch a film without thinking of how it may have been crafted? It’s a rare scenario for me, but I’m not complaining. I much prefer making movies than watching them anyway :)

Aside from my Prisoner’s analysis, I also did one on Inglourious Basterds (the first chapter) if you’re interested.

Posted on October 23, 2018 .

What Does It Mean To Be A Cinematographer?

In light of the trends of the world of "cinematography" that I notice on Instagram, blog posts and basically everywhere I look these days, I thought I'd share some thoughts on what I think it is to be a cinematographer. 


You walk into a room. Where's the light? Where's "the shot"? Over there....by the window....next to that lamp.....along side that wall....we've all got an "eye". We can practice using that eye. The more we use it, the better it gets...the better WE get at seeing. You've developed your eye and can now see beauty, even in mundane looking, boring places. This is what it means to be a cinematographer. 

NOPE! But it's a great skill to have.

You're on set. It's early, you're tired. What's the shot? Scene 2, shot 11 "Kitchen - Morning". I remember talking about this scene...and here's the story board. Starts with a wide at the kitchen bench? Got it. Grab the HMI, throw it through that window. Tweak it a bit, morning sun, DONE! Let's go in for the closeup, gimme the fiddy (50mm). This is what it means to be a cinematographer. 

NOPE! But it's important to be able to work quickly and work to a schedule. 

We have the Ronin for this one. Perfectly balanced, wireless focus, wireless video, an experienced operator. The director suggests that we shoot the entire scene on the Ronin....because we have the Ronin. What? But why? Just because. The Ronin is sick. Ronin shots are sick...especially if they're one take shots. This irks you, and although your practiced "eye" get's excited with the idea, you know there needs to be a better reason. You fight it somewhat, but agree it could be an effective storytelling tool for this particular scene. "What if we use the Ronin as the couple leave the house as a means to show their journey forward, that they're now moving forward, together...we could use the moving camera to help not only show their changing, dangerous environment (which is an essential part of the story), but also how that environment impacts the difficulty of the conversation at hand, and highlights the REAL strength they have as a couple, outside of the seemingly important argument they were having moments ago". 

The house was burning down, of course ;) This is what it means to be a cinematographer. 

GETTING THERE! But don't get too carried away convincing yourself it's a good idea to do something just because you want to / the director wants to do it. Maybe this scene would have worked better hand-held?

You get a call, it's on speaker...the producer and the director ask if you're available to recce a few places. You've got a well developed "eye". You're on board with the script and understand the goals of the story. You have ideas in your head about how things could look and cannot wait to see the locations. You also know that as important as locations are, they can be so much more fitting and better suited to the story if you take into account the time of day, the colour of the walls and furniture, the clothes and props the actors are interacting with, the ability to use practical light sources and the option of using your own lights, the power requirements of those lights and logistical requirements to rig them, the sounds of the space...the hum of the fridge, the buz of the fluros, the crashing of the waves or the passing traffic. You're excited about seeing these locations because your know that it's not only YOUR eye that will be inspired by them, but the eyes of others too. This is what it means to be a cinematographer.  

ALMOST! But you still have to put all of this knowledge into action, let other's make decisions about the film and come to an outcome together that works for the story. That's a lot harder than it might sound.

It's 3pm. You've been shooting for 12 hours. You only have 2 hours at this location and people, including yourself, are stressed. Stressed about the time pressure at hand, stressed about interpersonal relationships that have declined over the past week, stressed about when their next meal is coming and what it might be. You're Stressed about the fact that your vision of how things were supposed to look, is not going to plan. You're stressed about the fact that the power just went out and now we need to find the fuse box....stressed about the neighbors dog who's incessant barking is ruining the shot, stressed about your own ability to manage a team of people who are also stressed and are looking to you for guidance.  

The First AD storms into the room and gently asks "How long until we're ready to go mate?" Meanwhile actors are still in makeup, the power is still out and you've just realized that you've accidentally been shooting at 25 frames per second, for the whole day, instead of 24. You feel like replying with "How long? Are you fucking serious!!? Let's say, (200% sarcasm) give or take, 3 days. That should be enough time to sort out all of this shit.....but let's go 4 hours just to be safe, and where's that pizza BTW? I'm starving!".

Instead, you focus on what IS possible. You respect the fact that the First AD is only trying to bridge communication of events between yourself and other departments (one hell of a job). You come up with an idea that doesn't necessarily fit the original brief, but could work considering the circumstances. You gently let the camera and lighting departments know that you're going to have a chat with the Director about what to do next, preparing them for a potential Plan B. You speak frankly with the director, taking into consideration the time restraints and unforeseen circumstances. You communicate to the Director that as much as you're disappointed things haven't gone as planned, you're confident that this new idea could work but you're also open to any feedback. You present the idea as a solution - a solution that you know you can pull off. You work together and formulate a compromise that feels achievable and workable for the film. The First AD announces the new plan. You return to your department and explain in more detail what needs to happen. You're feeling good about the situation, even though you're completely shattered that your original idea about how this scene was to be shot...isn't going to happen.

This is what it means to be a cinematographer.    

YES! Although it's not always that challenging. On the other hand, sometimes it's worse! 

So, we see that looking deeper into the question, "What does it mean to be a Cinematographer" reveals that it's also about being a leader, a problem solver, an excellent communicator, a collaborator, someone with the ability to see beauty in the mundane and know how to create it but more importantly, someone who can motivate, delegate and collectively pull together a broken situation whilst staying true to a script and working with a team.  It's a big ask.

There are other, less hierarchical but still important skills that I mentioned earlier, including the more obvious, ability to SEE light. Seeing the light that is already there is an important part of developing your own style, along with framing and exposing it of course ;) Taking that a step further is the ability to create and shape the light, from scratch. There's an entire blog post about that I'm sure. It would describe in great detail the arsenal of lighting fixtures we have available to us today, where and when to use them, how to modify them and why - and even then, it would only be MY opinion, which is not the answer. What is the correct way to light and what is tasteful? Do those two things even exist when it comes to true collaboration and self expression? Where do we find inspiration and what is acceptable in that realm? How can you refine your craft if you don't have access to expensive and high end equipment? What are some practical tips when looking to improve your eye and ability to light? The list goes. It's almost an impossible ask to refine such a thing into a palatable, single post, which is why I started sharing my lighting breakdowns at the blog in May, 2013. Meanwhile, I still look at my lighting and shudder at times...not knowing what to do or how to improve. 

There's other things I haven't mentioned either. Things that deserve pages and pages of thoughts and discussion - deliberate lens choices, camera angles, coverage decisions, exposure techniques, etc, etc, etc. I don't mean to come across as knowing it all either, I just know that all of those things are important! I'm still experimenting and learning and enjoying the process :) 

Meanwhile, if you're rocking a decent beard, have 10K followers on Instagram, own an RED and insist on shooting anamorphic, you've still got 10,000hrs to put in ;) That's not to exclude the ladies! I just couldn't think of the female equivalent of a beard.... 

Matt

Posted on August 10, 2018 .

THE POINT (what is the point?)

Here's something I've been working on with some amazing people, for some amazing people who are doing amazing things for an amazing city....

Since moving to Hobart, Tasmania some 5 years ago, I've learned that the usual hierarchy of a film set, doesn't always necessarily work. I could have just as confidently written "the usual" doesn't always work either. More to the point (no pun intended), I have learned that in order to collaborate with others in such a competitive field, I need to listen more, talk less (shit), get comfortable with compromise (be comfortable with discomfort in other words) and be prepared to face my own narcissistic views on where and how I should be at this stage of my career.

I open the description of the above video with such a confronting paragraph because I feel the need to elaborate on a few things when it comes to giving credit, where credit is due.  

Who shot this? 

That's a fair question, especially when asked in the context of a cinematography blog, a Vimeo page or film making forum. And when I hear that question asked, my ego jumps to the front of the queue and screams "ME!!!", but that is not true...although it has truth to it.

For just under a year, I've been collaborating with a very talented,  creative duo here in Hobart - Mark & Tom. They began working together a little over 6 years ago under their new banner, producing high quality digital media in the form of video, web, design and animation. Both Mark and Tom have great skill sets and complimentary ones at that - Mark being at the forefront of video production and Tom leading the design side of things, they together produce consistent, high quality content that clients love and come back for. So how do I fit into all of this? That's a good question, and one that is still being talked about and negotiated.

A year ago, Mark contacted me and asked if I would like to help him shoot a series of commercials. It was a strange request, knowing that he was aware of my skill set and how it might overlap with his own. We eventually settled on "sure, I'll do the lighting...and the colour grading :)". Being careful not to trod on anyone's toes, I did however in my usual fashion, over-step the boundaries and push what most would find acceptable in the given situation. That being, I attended meetings with Mark and the director, gave strong opinions about things that weren't only to do with lighting, came along to recce's and slowly but surely pushed my way into 'helping' with shot decisions and lensing choices. Not really knowing Mark or the key crew from the agency, my competence and passion for the work at hand was well accepted, despite it's unusual place in the usual hierarchy of things. This gave me a great sense of contribution, acceptance and acknowledgement - all things I had greatly missed for a number of years here in Hobart (refer to earlier, miserable posts about "quitting the biz").

Needless to say, with a bunch of great people working on a great project, all with the ability to collaborate and work together for the sake of the best result,  the outcome was a success :)  Below is two of the six commercials we made for Tas Networks:

So, who shot these commercials? Mark did, of course, and he shot them beautifully. His style is his own, and I really admire it. But the outcome of the project as you should know, was the result of many, of whom I should include Tom. Tom knows very little about the Black Magic Design URSA Mini Pro 4.6K. He cares not for it's dynamic range, it's colour rendition or the lensing choices made on the day. Tom DOES however care greatly about the project at hand, offering valuable ideas, generating creative discussion and contributing in ways that simply cannot be given enough credit. Having someone as part of your crew who is supportive yet confronting, positive and optimistic when things fall apart and willing to do any job asked of him is simply invaluable. Let's not forget his well developed eye for design and his good taste in general. 

Meanwhile, I hope you're getting my point - one which I've written about many times before, but this time not from the explicit role of "Cinematographer". I'm contributing the great works in ways that are not exactly in line with what I had planned 10 years ago. I'm contributing in ways that don't necessarily have a title and cannot be summed up in a word or phrase that sits 'above the line' on a call sheet. It's a strange place to be, I'll be honest. It confronts my ego, all of my inner labels and ideas of success...and that's a scary thing.  

That being said, amidst this new territory as I veer away from hierarchical titles, I do feel a great sense of ownership and contribution to the work I'm doing and I am eternally grateful to Mark, and Tom, for allowing me to be part of it. 

On the topic of appreciation, there are a handful of others here in Hobart who deserve entire blog posts of praise and admiration - Richard Williams being one of them, but I'll get to that later. 


Finally, back to The Point video at the top of the page. Here are some credits:


Writer: Finegan Kruckemeyer (sorry we hacked some of it mate!)

DoP: Mark Kuilenburg & Matthew Scott

Lighting & Colourist: Matthew Scott

VFX artist: Mark Kuilenburg

Makeup artist: Liz Goulding

Creative Directors: Matthew Scott, Mark Kuilenburg, Tom Smith

Logo Design and Website Designer: Tom Smith

Areal photography: Ignite Digi (Tom Waugh)


There's more to add to that list, and that includes the wonderful, creative, daring and lovely people at Macquarie Point Development Group. Thanks Mary, Alex and Emma for taking a chance on us :)

Posted on June 15, 2018 .

OOPS!

Meanwhile, I'm confident that my findings are still as exciting as I write / speak about. The BMMCC is a fucking amazing camera that can compare with the RED Scarlet-X for 2K delivery....but unfortunately I have no proof to back that up! 

In any case, I'm very thankful for some of people who reached out to me regarding that blog post in a respectful manner...I didn't think anyone read my blog hehe ;)

Posted on November 2, 2017 .

RED's dead baby, RED's dead....

IMG_20170423_152401_DRO.jpg

I've been an a "proud" RED owner since 2012 and that camera has served me VERY well...up until about a week ago that is, when I finally sold it. What am I upgrading to you ask? Well, "proudly"....nothing! 

Everyone knows that your camera doesn't make you a better cinematographer...right? It's not the RED logo or brand association that pushes you forward...it's not 4K or 6K or 8K and it's certainly not 16+ stops of dynamic range. It's your focus and drive to create and master lighting, composition, story telling through a lens and shaping 2D imagery to be immersive, deliberate and supportive of a narrative. RIGHT!?!?? Sadly, no.

In this world, the success of your career as a cinematographer DOES seem to be about brand association, clever self promotion, social circles and silhouetted "set life" selfies. That pisses me off. Makes me mad. Goes against everything mum taught me as a kid.  So after 36 years of life, half of which I've spent dreaming and the other half pursuing, I'm looking for a middle ground. Meanwhile, there is another aspect of working as a cinematographer that is extremely important... 

People skills. What does that mean exactly? Well, again, there's two sides to this coin. Be honest, be true to yourself, speak up when something isn't right, be respectful to others, learn to compromise and communicate with tact. It's all about integrity, and it's all great advice, but honestly...I've been practicing those philosophies for over a decade now and what I've learned is that people don't actually like honesty. 'Most' people don't enjoy communication that is open and direct. They often don't care about the artistry, real skill sets or the passion behind your work, they care about brands, being cool, being seen, earning cash and how many followers they have. I realize at this point I'm probably starting to sound like a jaded old-timer...and that's got some truth to it I guess, which is why I need to change. 

So, the middle ground I'm paving now has me occasionally posting "set life" pics on insta, flashing camera brands around and hanging in circles I would normally avoid. It also has me biting my tongue, talking less about what I think matters, and listening more. Is it enjoyable? Hell no. Mostly because there's a certain feeling of self betrayal in all of this...but that's probably just pride and ego fighting back. In any case, change is required for sure. 

Meanwhile, with 12 full months of practice, I'm feeling pretty good about the new "Matt". A new model, "Matt" that can support a family AND progress as a cinematographer in this crazy age of technology and social dynamics, without completely selling out hehe ;) 

ANYWAY! Back to the camera....

So, the RED is gone. It was a sad day, but it was also motivating. Since moving to Hobart over three years ago, I've really had to let go of a lot and start fresh. It's been super tough. As much as I love this city, I didn't think I'd basically have to start again (career wise).

Although I sold the RED, you've probably noticed that I don't shut up about the Black Magic Pocket Cinema Camera (BMPCC) and Black Magic Micro Cinema Camera (BMMCC)? Well, there's good reason for that....

Once you couple a speedbooster and an IR-Cut OLPF to the BMMCC, it reduces the crop factor considerably. It also leaves you with a camera that captures beautiful colours with lot's of detail, has no moire and can record full sensor 60p 3:1 RAW (12-bit), all to an off the shelf SD card. With 12.5 stops of dynamic range, compressed and uncompressed RAW recording options, ProRes HQ recording AND a FULL STOP more sensitivity (thanks to the speed booster)...how does it compare to the mighty RED Scarlet-X when delivering at 2K resolution?

I could write and crap on for pages about how I think the micro is comparable and in some ways better than the RED Scarlet-X (when delivering for 2K), but it's probably best to test that for yourself! I did create a comparison video and had originally uploaded it here, but have since realized that the videos I uploaded were actually of from the same camera! (it was the bmmcc for the record). That was a massive mistake from me and something I am truly sorry for. I have since made a "sorry" video which you can watch here.  

So who really cares if the BMMCC and BMPCC can compete with / be cut and graded along-side RED's high end cameras? Probably about 5% of you who are still reading this. Why? Because people don't care about this stuff...they care about brands, status, hype and the fact that they just invested $25K into a camera system the promotes all of those things. I was one of those people....and I spent more than that in the end. So what is my point to all of this?

The point is, I'm a crazy guy. I need to know how things work, especially cameras hehe :) I also dislike bullshit. I love challenging people and ideas that get thrown around the internet. I love getting to the heart of an issue...and learning new things. Knowledge is power, which is why I made this comparison! It's tests like these that allow me to up the production value of films that I shoot, offering more to my clients when budgets get in the way. But finally, it's also is a great way to enter debate with pretty much anyone working in the industry..."You know the pocket cam with some extras is basically the same as a RED Scarlet-X?".....people will look at you like you're an idiot, like you have no idea what you're talking about and assume you're a far worse cinematographer than you actually are. Sadly, continuing statements like that will probably place you in a position that slows the phone calls down and discredits your perceived abilities to potential clients.

Of course, not ALL people I meet fall into this self painted, jaded dreary description. In fact, although my circles have lessened over the past few years, they've also been refined. I more often than not work with wonderful, like minded people who I now consider close friends :) 

Should I have just posted the camera comaprison and be done with it? Probably ;)

PEACE!


Posted on August 17, 2017 .

Pokemon Fan Film Madness!

For the past few months I've been shooting, editing and grading one of the most exciting projects I've ever worked on! THE RESURGENCE - A Pokemon Fan Film. Robin Brown and Reece Manning (Revolving Door Productions) put a lot of trust in my services and so far it has been both super challenging and ultra rewarding. As Director of Photography I faced many challenges and was constantly pushed FAR out of my comfort zone. On top of that I experimented with new lighting techniques and learned to master new gear (flying the Ronin for one), whilst staying in line with the requirements of the story and collaborating with all heads of departments. What a dream! I'm actually living the dream hehe ;) 

Whilst there is lots of work to be done, the teasers are being released today and the second one later in the week. We are SO FRICKEN EXCITED!!! :)

Below are some grabs from the film and the teasers....I'll be sharing more about lighting setups and camera techniques of course, but I gotta finish the edit first. In short, I shot most of the film on the RED Weapon Dragon at 6K (5:1 compression) and the rest on the Blackmagic Pocket Cinema and Micro cameras (1080p 12-bit RAW). 

Thanks for visiting!

Watch the RED Teaser above :)

Posted on August 9, 2016 .

BMPCC OPTICAL LOW PASS FILTER SWAP (No More Moire or IR Contamination!)

It's been a few months now since I got my very own Black Magic Pocket Cinema Camera (and from now on, let's call it the BMPCC), and during that time I have been testing the absolute HECK out of it! It's still awesome :) One thing, slightly off topic that I found very fascinating which has nothing to do with the camera per say, is the sheer amount of emails and messages I received saying something like:

"Can't believe you got rid of your RED!", or "How's life after selling the RED?"...etc, etc, etc, etc.

WHAT!?!??? I never sold my RED Scarlet-X, and I don't plan on it! It's still my A-Camera, an AMAZING camera and one capable of capturing the best image than any camera that I own. So. Just cos I got all excited about a tiny camera that can fit into my pocket, doesn't mean I got rid of my other cameras :) On a side note, is the RED better than the pocket? In almost every department it sure as hell is! But let's get back to the BMPCC, and continue the enthusiasm I have for THAT camera :) Well...enthusiasm, AFTER I solved the following issues I and many others have had with it ;) Let's start with:

INFRARED CONTAMINATION

As much as I fricken love this pocket rocket of a camera (the BMPCC), there are some issues with it when it comes to image quality. Let's start by talking more about IR Contamination/IR Pollution. "IR" meaning "Infra Red" and pollution referring to the colour cast it rains on your image. Typically, it's believe it or not, red! Or more accurately, magenta.  


Remember this example from a few posts back? It shows exactly what I'm talking about. When you block out regular old light with an ND filter, infrared light sneaks past the ND filter and still gets in! The result is that blacks go pink and blues go...ummm....purple. So you might be looking at that image thinking, "I could fix that in Resolve bro!!"...and well...maybe you could! I've been colouring films professionally for two years now and manipulation images a LOT longer than that, but I still struggle to find the neutral colours that WERE there before infrared contamination (let's start referring to at is "IRC"). Remember too, that it's not just blacks and blues, it's ALL of the colours that get polluted. IRC affects the entire image and basically destroys the beautiful colour science that's built into the sensor. The more ND you add, the more IRC you get! 

So what's the solution?  Well, you gotta block that shit out with an expensive filter that attaches to the front of your lens...or lenses. I say expensive because DAMN I mean it, especially if you want to cover your entire glass set with screw on's. It's hidden costs like this that quickly turn a cheap camera into a not so cheap camera. 

For example, the 52mm filter below cost me over AUD$200. On top of that I purchased a 77mm variant which cost about AUD$250. They work wonders and I now days I don't shoot without them but HELL! To top if off, I've considered adding a 4x4 IR CUT to my big camera kit for when I'm using a matt-box (the red suffers from this problem too) or with lenses that aren't mine and don't have the right filter thread size. I haven't tested this one out yet, but here's the 4x4 from Skier Pro Systems which isn't too badly priced: SKIER 4x4 IR CUT. You can also get ND filters called "Hot Mirrors" which are basically an ND and an IR Cutter in one, but I'd rather the option to be honest. More to the point, I can't afford to replace all of my 4x4 ND's with Hot Mirrors hehe :)

So if you've got the coin, IRC isn't a problem any more...just make sure you shoot with one of these filters in front of your glass and you'll be good to go. But what about when you're not shooting with ND? Well, it's up to you. Technically, you shouldn't shoot with IR on bare glass...but I've found with the pocket that colours are still nicer with the filter on, than off. That being said, without ND, shooting with IR can make the image ever so slightly green....but it's nothing that can't EASILY be fixed in post -  it's nothing as serious as IRC. 


MOIRE & ALIASING

Now here's an issue that is FAR MORE SERIOUS than IRC. Well, I say it like that because this is one thing that is NOT fixable in post...not to a degree that I feel is passable anyway. So what the crap is "moire" and how the hell do you pronounce it? I don't know but I do know that it totally sucks. I did some research on what exactly "moire" is (it should have that little thing on top of the e, but hey), and according to Wiki, it's basically MATHS! hehe ;) Take a quick read of this in depth explanation of what it is and why it occurs. WIKI ARTICLE ON MOIRE PATTERN, and you'll start thinking what I'm thinking....."If it's maths, it can be solved!!" Hehe ;)

Well, turns out that's completely true! I remember when a company called 'Mosaic Engineering' created a moire solution for the 5D Mark II several years ago, but that was also around the time I pre-ordered my RED Scarlet-X (which you can read about here if you like!) so I was distracted. That being said, when I noticed my beloved BMPCC suffering from the occasional moire attack (much less frequently and less severely than the 5D Mark II), I went back to Google and asked again...

GOOGLE: "moire solution for blackmagic pocket cinema camera" which again, lead me to mosaic engineering's website

Mosaic Engineering create replacement OLPF's ('Optical Low Pass Filter') for different cameras, which FIX MOIRE! No shit. These OLPF's are specially crafted, precisely 'engineered' pieces of glass that sit in front of the camera's sensor, replacing the original, factory OLPF. 

Here's a video to the right, created by Kin Kwan which demonstrates one of their OLPF's and how it can improve the image quality on the Blackmagic Cameras:

So, after seeing that I was like "FUCK YEAH LET'S BUY SOME SHIT!" and went straight to their website. I literally had the filter in my checkout basket but then, out of nowhere, I did something completely out of character. I stopped and thought about what I was about to do.....yep. It was a strange moment for me, but I took it quite seriously. I then began typing furiously into Google's white rectangle and after a few specific searches, I found this video:


I was gobsmacked. Imagine!!...An OLPF that fixes moire AND IRP!!?? That's exactly what you're seeing the result of to the left in Hans Hijmering's video. I quickly emailed the guy and after a few questions, made my purchase with him instead :)

SHARPNESS

My biggest concern with anti-moire OLPF's was a loss of sharpness. It's true too, you DO lose a small amount of detail in the image. Hans tells me it's not real detail anyway, more so the result of aliasing, but still...it's noticeable. That being said, MOST of it can be brought back with post sharpening. There are test charts and other videos that show sharpness returning after post, but I was very curious to test it for myself and see the results first hand. That's when I asked my fiance Laura to come and help me with a quick camera test! Almost 5 years of camera tests now - she's much more co-operative these days hehe :) See the results of Hans's IR Cut + Anti-moire OLPF on my BMPCC below!

You might be thinking that this web compressed video is not the best way to pixel peep and you'd be absolutely right! That's why I have made both of these clips available for download in the DOWNLOAD section of the blog (12-BIT RAW cDNG) :) Take a look for yourself and see the benefits of this amazing OLPF!

INSTALLATION

Hans sent me an installation video for the OLPF and it looked fairly straight forward, so I jumped right in!

It's scary at first....opening up the sensor like this. But don't worry, just make sure you're not eating toast while doing it, and seriously though, don't be tempted to use a lens blower while the rubber "O" ring is out and the OLPF is just sitting there because the ring will jump up and get blown around violently if you're not careful which could scratch the ACTUAL sensor. You don't wanna do that....so, if you see some dust in there, wait until you take the OLPF out before you blow ;)

Hans also supplies you with the suction pen and tweezers which makes the installation simple :) As you can see, the camera actually LOOKS cooler too hehe :) Not that you'll be flashing it around without a lens on, but hey.

Once it's all snug and secure, if you're using a Speedbooster (or any focal reducer for that matter), you'll have to adjust the rear element to achieve proper infinity focus. Since the OLPF is a NEW piece of glass sitting between the lens and the sensor, it changes the back focus of the camera. If you don't adjust the rear element of the focal reducer, you will not be able to achieve infinity focus. Again, Hans gives specific instructions on how to do this and it's a simple process :)

COST

At the time I purchased my first OLPF from Hans, it cost me USD$375. Again, that's a lot of money! But remember how much those IR cut filters cost me? And I had to buy two of them. Now, my camera is permanently sorted! No matter what lens or how much ND I use, PLUS, moire is almost entirely gone! It's awesome :) I know hans is constantly perfecting the filter and it's installation, and recently sent me a picture of one he's created for the Blackmagic Micro Cinema Camera! Looks rad, and seems to have a better "O" ring installed :) 

While Hans is getting together a new website for his OLPF's, the best way to contact him if you're interested to know more is via

email: hanshij@xs4all.nl

To finish, I just want to mention that I planned on doing this review, regardless of the second OLPF discount Hans gave me (thanks mate!). You'll notice I don't have any adds or sponsors on my site, despite the hundreds (seriously) of offers I get. This is one place on the internet that I will keep add free, click bait free, and basically just FREE. Fuck that add shit! Thanks for visiting and I hope you found this information helpful! 

Matt


Posted on July 15, 2016 .

The Pocket Camera Effect

Here's a few of grabs from recent tests with my bmpcc. I'll eventually upload some moving footage too, but for now I just wanted to show how different your shots can look if you create and focus with deliberate intent (backed by enthusiasm and inspiration of course - these came after watching Z for Zachariah and a horror film hehe).

Hope your year is off to a great start!

Matt

Posted on February 1, 2016 .

NEW CAMERA, NEW LIFE (drama, cliches and old ways)

Over the past six or so months I've made some huge changes. Personal changes and professional ones too - I looked at my career as a cinematographer and tried to pinpoint what wasn't working, or how I could do it better, do it happier. So what wasn't I enjoying about my career in the first place? Well, fluctuating incomes, inconsistent work leading to financial issues etc, etc. On top of that, I began to feel the pressure of working on 'no-budget' films where time and money were less than limited and the expectations were super high and hopeful. The usual story of any freelancing film-maker who takes their job seriously and tries to break into the inner circles of the industry. I've been TRYING, professionally, for nearly 7 years now...so when will that hard work pay off? When will I get invited into the 'inner circles'? Sounds sad doesn't it. And frankly, it is kinda sad. Like everyone, I wanna work on the big films, with the big gear, the big lights and the big crews. I want to be paid my day rate, not a students day rate. I want finely detailed storyboards, weeks of pre-production, luxurious locations, 50KW of portable power, exotic and frequent craft service schedules and people who respect what I do. The sad part is, I think I've realised that that's never going to happen, not unless I change. 

SO! There's the realization part out of the way. A painful part, but hey. That's the dramatic side of this blog post for you :) So now for the camera part. 

What have I MASSIVELY missed since I purchased my RED Scarlet-X back in 2012? Mobility. Speed. The freedom to JUMP into action when inspiration hits. That's not to say that you can't "run and gun" (I hate the phrase) with a Scarlet, but let me assure you that even though it is relatively small, it's relatively fucking huge too - especially when you rig it for work. But here's the thing. I've spent that past several years focusing less and less on quick setups and available light, and more and more on lighting from scratch and working with a team. And to be honest, the Scarlet is perfect for that..and let's face it...that's how a movie SHOULD be made....right? Time, planning and collaboration - that and some wiggle room for accidental magic. The problem is, I'm rarely called upon to be part of a shindig like that. To cynically break it down, it usually goes like this:

"Dude, we love your work. We want you to shoot our film. We have no money and no time. We love your work. Come with us. Dude!".

So then I read the script and think...yeah....okay. I'll just have to eat less and skip some bills this month. At least I get to light a camp-fire scene (which I'm still DYING to do BTW). So then we have three days un-paid pre prod which often involves no production designer or location manager, and I'm going to stop there because this is just going to get depressing hehe ;)

The point is, I love shooting and lighting films and that's what I do, 110%, no matter what. The more paid films I work on the better, and even better than that, the more awesome people I work with and meet, the better again :) The problem I was facing outside of the above issues was that I felt like my camera, my awesome RED Scarlet-X (that has never let me down), was actually....letting me down. Was it the image quality? No way...I love that sensor. It was the bulk and weight of the thing. But let me explain a little more, before we get into that.

The only time I've ever grown as a cinematographer is when I've tried something new. Lit in a new way, or shot in a new situation. The problem was, I wasn't seeing enough new situations. I wasn't being presented with new challenges.....just the same old "make this shit location look awesome using the lights you've owned for years and do it fast". Sure, that challenge is a great one, but it's not exactly inspiring, well, not every time anyway. I'm lucky enough to have this kinda "flame" in me (I know right...next I'll be using the word 'journey'), in other words, I get SUPER inspired to try stuff. I'll see a shot in a movie and think "FUCK! That's looks SICK! I want to try something like that!". But then I'm faced with the internal dialogue "FUCK! I'm gonna need some help with this cam....and a permit for that location....and some big ass lights....and a crew to help me". Then, not long after, the inspiration fades and I get back to looking at Instagram feeds of successful DOPs closing down streets with balloon lights above, shooting RED Weapon 8K and Arri Master Primes rigged to a Movi following a Ferrari.

BEFORE I grew up and suffered like this, I used to grab my 5D Mark II and get out there. If I had an epic idea, I got epicly inspired and got the fuck up and SHOT shit. That's how I learned! That's how I became [MTS]Films! What the hell happened!?!? God damn it....hehe :)

SOOOOOOOOOOOO! 

Change was needed. I HAD to fix this shit, and now that I knew what the problem was, I decided to buy a small camera again. Sony A7S(II)? Nearly......GH4? Almost. 5D III hacked? Yeah...maybe....but it's too expensive for what it is and the workflow required. I don't have any money remember? So then I looked at the Black Magic Design family, and what a lovely family they are. 

The BMPCC (Black Magic Pocket Cinema Camera) was released a few years ago and I was impressed back then....but back then I was like "I got a Scarlet so I don't need a Pocket cam". That was true....back then, remembering that it was THE ONLY MOTION PICTURE CAMERA that shot RAW, and wasn't priced over $100K. Anyway, the pocket cam for me, is BASICALLY a pocket sized Scarlet. Once you pop on a focal reducer you can get the crop down to actually LESS...it shoots RAW and it's the size of two iPhones stacked on top of eachother (the only thing iPhones are good for is this comparison).

So now I'm mobile again let me tell you I'm fucking loving it! I'm back baby!! hehe :)

But what about the battery issues? The black sun spot issues, the IR contamination, the moire, the rolling shutter, the shitty monitor....etc, etc. Yeah, yeah, what about them? They're all manageable. And for the wonder's it has done to my life thus far, they're minor issues. My new 'life journey' haha....is underway. 

Just quickly, let me adress the issues I faced with this cam and how I've solved them.

THE BATTERY ISSUE

The internal 800mAh battery that comes with the camera is good for 30 mins. So, not real good. The plus is, the camera can be powered externally which also charges the internal battery! So, I've purchased a couple of these super light, super cheap batteries from e-bay and they power the cam all day. The best part is, I basically use them to charge the tiny battery inside when I'm not recording. Once it's time to roll, I just un-plug and I'm wireless again for 30 mins. It's awesome!

IR Contamination

It's pretty bad on this camera, especially when you're using ND. Basically what is happening when you place a Neutral Density Filter in front of the sensor, you cutting out light waves to make the image darker. The problem is, you're NOT cutting out the Infrared Rays so they sneak past and saturate the image. This makes your shadows and blacks all magenta and murky. YUK! 

Thankfully it's not a problem if you add this filter to the mix. Check out the example below to see what I mean.

ND is an essential tool. There are cheap options out there, but this is one area I wouldn't skimp on. Tiffen makes excellent filters and this variable ND for 52mm thread lenses works very well, even at the heavy end. 

MONITOR (or lack thereof)

The built in monitor on this cam is pathetic. Sure the resolution is okay, but the brightness, contrast and viewing angle is just shit. My whole point with this cam is to keep it light and free....so instead of purchasing a new external monitor, I've gone for the "view Finder" alternative - which basically gives you a glare free, magnified version of the monitor that is built into the cam. No batteries, no worries! It's not the best solution, but it's a cheap one, for now. I will eventually be purchasing an electronic viewfinder, but that's going to cost more than the camera itself! 

ROLLING SHUTTER

It's not great. But neither is my RED Scarlet-X! Sure, if you're shooting fast cars and running with the thing, you'll notice it....but honestly, do you think this shot below suffers so much to be a deal breaker? I think it's fine!

Speaking of hand-held....shoulder rigs that actually work (I mean balanced rigs that you aren't fighting all day) can be super expensive....and super bulky. I'm not saying this is a perfect solution (focus isn't really sorted), but for $20...I mean really. It's mad! I shot the above with it, and it felt pretty good considering.

THE CROP FACTOR

The sensor on this camera is fricken tiny. It think it's equivalent to super 16mm, or there abouts. Point being that if you stick a 35mm Full Frame Stills Format lens on the front of this thing, you're looking at a 2.88x crop factor! In other words, a 50mm lens will cover a field of view similar to that of a 140mm lens!!! This WOULD be a deal breaker for me. I can handle and actually have grown to love the crop on my Scarlet-X (1.73x) but 2.88x? MAN! Thankfully, physics and engineers made it all okay. SEriously! Now there's a thing called a "Focal Reducer" which basically does what a magnifying glass does to the sun when you want to burn stuff with it...remember? Anyway, it's a piece of glass that sits between the sensor and the lens and it's job is to "reduce" the size of the circle of light that is coming through the lens. It does exactly that and projects it onto the tiny sensor and now because the image circle has been made smaller, the sensor can see more of what is being projected, hence reducing the crop factor...SO COOL! Not only that, but because the light is being concentrated into a smaller area, it's also brighter than it used to be and apparently 'sharper'. With this particular focal reducer (Roxsen), you gain a full stop of light and it reduces the crop factor from 2.88 to 2.25. Still pretty heavy, but I'm getting used to it. Don't forget this is the poor man's version of a "Speed Booster" which is the same thing, only 10x more expensive - the main difference being that a rich man's Metabones "Speed Booster" reduces the crop factor by .58 (end result being 1.67x crop - LARGER than a Scarlet-X!), gives you an extra 1 2/3 stops of light AND has electronics to control lenses. Probably worth the money, but hey. Not just yet. For now, my ROXSEN Focal Reducer is working wonders :)

MOIRE

This is a scary word that is scary because USUALLY if a camera has it, it's like herpes. The is no cure. BUT! Thanks to a company called 'Mosaic Engineering', you can no buy a little piece of masterfully engineered plastic that sits right on front of your sensor and eliminates it. It's about $400, but I think I will be getting it eventually. That being said, the moire on this camera is NO WHERE NEAR as bad as people make it out to be on forums and the internet. If you're used to the moire a 5D Mark II delivers, then you will be pleasantly surprised with this camera. I've only come across two situations where it was an issue so far...but hey. The camera costs USD$1000...just remember that :)

Is it a problem? Yes. Is it a deal breaker? No...and remember, it can be fixed!

So, issues aside, I'm super stoked that my full set of AiS Nikkors that don't get used anymore will actually be used again! I spent a good year collecting those and as much as I love them, like most low budget guys I ended up purchasing the full set of Samyang Cine lenses for reasons of gears and smooth iris control, and, they have been great. They are however considerably larger and heavier than my nikkors (because of speed mostly) and made of plastic. The nikkors on the other hand are tough, smooth and sexy. Part of the reason I love this little camera is again, because it's little. So, keeping my lenses small is also a plus.

Not only has this small camera ripped me off the couch and off of Instagram, it has also open up exciting ideas and possibilities of camera movement. That's another thing that the Scarlet-X often blocks. Moving that thing requires some serious gear and strength. Although I've flown plenty of steadicam with it and done a few jib shots...it's always been a big deal, and a somewhat painful process (remember, I have no money and neither do the filmmakers I work with).

With the rapid growth of Gimbal technology, things are seriously looking awesome for small camera owner operators! Dave Dugdale sheds some light on them here....(thanks Dave! Check out his website for lots of useful info HERE) I think I'm gonna get that CAME Single :) Imagine micro moves....push-ins, tiny jib movements and shooting in cars!?!? It's going to be awesome. 

Meanwhile, I've been testing this camera for a couple of months in many different situations - one of which, of course, was in a controlled lighting environment. Once a month I run workshops where I teach film-makers how I light and think when I'm on set. They are awesome fun and attendees get a lot out of them. Usually the courses focus on using a RED camera and a fairly high end (low budget) lighting kit from our local rental house. This time however, I busted out the little pocket cam and tried to keep lighting super low budget using the lights I own. Check out the result below:

The focus here was ULTRA low budget. But let's not forget that good cinematography (just patting myself on the back here, don't mind me hehe) has little to do with the camera, and a LOT to do with lighting, composition, production design, colour palettes, acting and blocking. But you already knew that ;) The ULTRA low budget part came with using a location that was already dressed. Keeping the shot simple (no camera movement, no focus shifts), using cheap, relatively low powered lights and of course, having someone on screen who just looks and acts...cinematically awesome hehe :) (Reece Manning is a legend). The other thing we didn't' do was record audio on set (I did it all in post, recording my own sound effects). 

Lighting wise I used my kit - specifically 1 x 650w and 1x 300w Tungsten Fresnels made by CAME-TV in china. They are branded "As Arri", meaning that they look almost identical to an Arri equivalent...and I can tell you from experience that they produce the SAME LIGHT as an Arri equivalent. The other light source was my trusty no-brand 1000 LED panel that I purchased off e-bay several years back. You can see exactly how we lit this scene below (and be sure to visit LIGHTING section HERE where I go into more detail).

You may have noticed that the highlights are clipping on Reece's shirt and some of the desk. This was actually deliberate. One thing I've learned over the years is to really look at your scopes and know exactly WHAT is clipping. If you search cinematography forums and browse YouTube videos, you might find that a general rule of thumb is to "protect your highlights". Sure, that's a fair GENERAL rule. But then again, if I were to protect that shirt (not modifying the light), I would have lost almost a full stop of exposure on his face. So, the idea is to keep focus where focus is needed, and expose for the most important part of the image. IF clipped highlights are going to ruin the shot, then sure, look at ways to fix that by modifying the light...don't just stop down your lens, look at your scopes and feel good that nothing is clipping. It can be scary the first few times hehe...but I assure you that you'll get cleaner, better looking images if you adapt this idea. Of course if the clipping was happening on Reece's face and skin, I would have done something about it. But, a white shirt being back-lit? I'm cool with that. What's also important is HOW a camera clips. I find that this little pocket cam handles over exposure very nicely.

For more detailed notes about how I lit this scene, check out the LIGHTING section here :)

Sure, we're not shooting 4K here....but who would have known that? If I told you I shot this on the RED Scarlet-X, you'd probably have believe me. Hell, I would have believed me. I'm still blown away by the image quality this camera delivers. High bit depth, excellent colour and nice highlight rolloff..these things are FAR more important than resolution, frames per second and global shutters. The 100mb/s 4K 8-bit 4:2:2 files you get from a Sony A7sII are just gross. Amazing detail? Yeah. Low light king? Sure! But fuck that. The SOUL of the image has already been extracted and is waiting for you on the F65 with a raw recorder. 

Meanwhile, take a look at this shot for an example of the BEAUTIFUL detail this 1080p camera captures. It really is something. In fact, I'm finding it look sharper and has more detail (at 1080p) than footage I've shot with the Scarlet which has then been subsampled down to match. 

Check HERE for less compression

It's probably a bit of a stretch to say that this camera captures better detail at 1080p than a Scaled down 4K image from the Scarlet, but hey....that's what my eyes are telling me without a side-by-side comparison. In any case, you won't be disappointed by the resolution this thing resolves, it's awesome :)

COLOUR GRADING

In the past few years, colour grading and colour correction have almost become necessary skills for any film-maker, especially since every camera now shoots "flat" or in some sort of LOG gamma mode, and every film-maker is a shooter, editor, colourist and sound designer ;) It's kind of true though - I'm a big believer that you should know the basics of all areas, whilst mastering one. Colour grading has been a part time profession for me over the past three years and I find it very rewarding - especially when I'm not shooting. Furthermore, I find that it makes me think more about my lighting because I know what to expect in post. 

Coming from RED (and the whole reason I purchased RED), it was a delight to be able to play with 12-bit RAW files from the pocket cam. Sure, they're not 16-bit (a-la-RED at 3:1 compression) but I'm yet to 'feel' that loss. 12-bits is MORE than enough for most work, and probably just enough for the rest. The workflow is no problem either, since Davinci Resolve plays and edits the cDNG sequences like no tomorrow. I'm running an old HP Dual Xeon z600 with a Radeon R9 390X and I can grade the SHIT out of these cDNG's at full res, no sweat.

The issues I had with the my first images coming from the camera was this slightly muddy, over-all brown/magenta tinge. This just made grading a bitch because no matter what I did, none of the colours were neutral and although I was loving the RAW flexibility, AND could create a nice stylized look, I couldn't for the life of me balance for neutral colours. If you're having this problem too, it's 100% IR contamination (or you've mixed lighting, have the wrong white balance or your lenses are old as hell). Get yourself in IR cutter like the one I mentioned earlier and your little pocket cam will be recording beautiful, rich colours again :) Keep in mind that technically speaking, if you aren't using ND filters not ALL scenes will exhibit IR contamination, so really in that situation you shouldn't need one. The other thing to note is shooting with MEGA amounts of ND...like 10 stops. Up that end, your Hoya IR cutter can only do so much, so you'll still get IR pollution in that case. 

So what about LUTS!!!! EVERYONE WANTS DEM LUTS! 

I don't know....the whole LUT WAVE drives me a bit nuts. It's the idea that LUT will make your footage look good. A short cut...if you will. That's all well and good, but it frustrates me that people aren't prepared to learn how to grade without a LUT...Don't get me wrong! I love a good LUT, and often they provide a nice 'frame' to work in, but yeah. There's a lot more to lighting and understanding colour than using a LUT and posting it on Insta. Anyway, the shot of Reece at the desk was graded in Resolve, but I didn't use a lut. What I did do, is exactly this: 

If you feel like having a play with this shot, feel free to download the entire sequence and follow along with the un-polished-non-rehearsed tutorial I whipped up this arvo. And if you've got time, please share with me your results! I'd love to see the different looks people come up with :)

ALL IN ALL.....

It's the same old stuff. It's not about your camera, or your lenses. We all know that by now right? Today's cameras are phenomenal..and in most cases, can capture MUCH better stuff than we're putting in front of them. My goal is strip back as much as I can and really focus on the craft. This tiny pocket camera was JUST what I needed lift me out of the jaded rut. It's so good to be back out there and pushing my limits again. Thanks for stopping by and reading my rant, I'll be sure to share more findings as they come.

Matt

Posted on January 29, 2016 .

STUDIO TUNGSTEN LUXURY (and set builds with dad)

SINM_Studio_01.jpg

Lately I've been looking for resources on line where I can learn more about lighting for film. I'll often finish watching a lighting tutorial or read an article detailing "how we lit it" and find myself sitting back and saying "yep, cool, I'd probably do that too if I had a million dollars worth of grip and lighting equipment and enough power to run a small city".

I've been lighting with basically the same kit for several years now and am beginning to see what a difference larger, more powerful sources can do (as you'll see later in this post). That being said, my kit contains no such large sources, although the 1.2K has really helped. 

1 x 1.2K HMI (e-bay knock-off)

2 x 650w Tungsten Fresnel (e-bay knock-off)

2 x 300w Tungsten Fresnel (e-bay knock-off)

2 x 500 LED Daylight Balanced (e-bay knock-off)

1 x 500 LED Tungsten/Daylight dial-able (e-bay knock-off)

I've shot 5 features, many shorts, a few commercials and a TV pilot with this kit....and I'm still pushing the limits of what I can achieve on a house-hold circuit. That being said, there are a couple of points I'm trying to make here...

1) Lighting with relatively small sources (like the ones above) can be super challenging, especially when trying to maintain contrast. 

2) There are plenty of "learn lighting", or lighting break-down resources available, but many of them utilize MASSIVE light sources that are often out of the reach of most independent film makers, OR, contain so many sources in the setup ( 4 x Red Heads, 1 x Kinos, 2x Didos, 1 x 2K Tunsgten for example) that you'd need a 10K generator to power them.

I'm not saying that hiring lights isn't an option - I'll often supplement my kit with an extra 1.2K, or hire a genny for out door stuff, but that (often) isn't always possible on the no budget films that come my way. It's both a blessing and a curse I guess...because one way it forces you to be creative and resourceful, but on the other hand you're trying to work towards a goal that requires a lot more time and power, and this can be frustrating to say the least.

LED technology has come a long way and if you can afford them, they're a great light that will get you around the power restrictions I'm talking about.  That being said, I'm a fan of hard light, so LED panels aren't a substitute....sure, there are LED Fresnel's, but they aren't super bright, or affordable...and if they are, they're green, pink or something else that you'll have to deal with. It's something I haven't looked into for a while though, so I could be missing something. 

Throughout my adventures as a cinematographer, I've always had this voice in the back of my mind that is like "damn, if only I had a roof full of space lights right now", or "a couple of 10K's would sort this out", or "I wish we had the power to light up the FOUR of those blonde's". And then I go and try to make do with what I have. It's not healthy to blame your gear (or lack there of), but I guess it's good to know what your limitations are so you can work with them and know what to expect. 

Before this post gets too long, I better get into what prompted me to write it in the first place. I recently wrapped shooting a short film for Writer/Director, Michael Young called 'Someone I've Never Met'. It's a super short short, is well written and cleverly designed. I was instantly excited about shooting the film when I learned how passionate Michael was about the set and what colours he wanted to emphasize, and how clearly he saw it all in his head. With a few pre production meetings and some serious planning, we both went ahead and with a confidence that we could deliver....well, a face of confidence anyway hehe ;) Whilst discussing the look of the film, with any director, I'll be thinking in the back of my mind what sort of lighting I might need to achieve it. Then, I scrap those ideas because we can't afford them and think again about how I can use my usual kit to get there. The difference with this film was huge though....because once I realized half of the film would take place in a studio, I knew we had some serious power. On top of that, I learned that we had the following...

3 x 5K Tunsgten Fresnel

6 x 2K Tunsgten Fresnel

2 x Blonde

That's 28,600 Watts of light right there....and I'm used to using around 3000 Watts. Also, I'll often steer clear of tungsten lighting too, because power efficiency wise, they're terrible! So, not only did I have the large sources I wanted but I also had enough power use them all at once, and the option to dim them to any level.  

And then there was the set. This is first time I've worked with a set build that had not only been thought out very cleverly, but also designed and constructed in a way that made my life super easy :) It's kinda of a funny story actually, because I've always wanted my parents to come a visit me on set, or actually see what I do! Because mostly, they'll introduce me at family dinners or outings as a very talented "photographer" and don't really seem to have any REAL idea of what I do haha...god belss'm, they're a lovely bunch :) So anyway, the opportunity came up where Michael was looking for a set builder. My Dad's a builder, but has never set foot on a film set before, let alone one I'd be shooting hehe. So I put him and my mum (an amazing artist) in contact with Michael and a week later this is what they came up with!

The walls were movable and everything just looked so legit! Even down to the painting and functioning door - we were all thrilled and so were the hoards of people coming in and out just to take a look :) Needless to say, I'm sure dad will be doing more of this sort of work in the future hehe. So, a set is one thing, but let's also take a look at the colour palette and how well designed the space is. Michael sourced nearly all of the furniture from opp shops and second hand stores. He specifically chose colours that would suite the tone of the film, which he had already determined well before the set build began.  

Michael's carefully selected colour palette for his film 'Someone I've Never Met'

Michael's carefully selected colour palette for his film 'Someone I've Never Met'

With such attention to the look and feel of the film BEFORE I even got there, it really did make my job easy! When I say easy, I still spent an entire day pre-lighting the set, making refinements and adjustments until I was happy (which I very rarely am), but let's just say that the "look" of the film had mostly been determined by the set and production design - it was now my job to enhance that and paint in the time of day :) Once I learned what light I had available to me, I began a shot list and lighting plan in my favorite app 'Shot Designer' :)

"warm", "inviting", "morning sun, "shortly before opening hours" were approximate descriptions given to me when I asked about how this half of the film should be lit. So, of course I wanted to fire up those 5K's and get some volumetric light happening.

I ended up changing a few things in the final lighting setup (you can see an in-depth lighting breakdown of the shot HERE), but my idea was pretty close to what I needed. Seems like I should trust that pesky voice in the back of my head after all ;)

Here's the final shot and a few more grabs from that scene...

The other half of the movie takes place in a dark house, at night. We didn't have a lot of time or resources there but I think it will work for the film. I hope this experience doesn't spoil me...cos now I can REALLY see how much easier it is to light using larger sources, and how much better it is having complete control over the lights position and dimmer setting (all lights were hanging from the ceiling except the Blonde's). It was also nice to be working with a single light temperature, without having to match lights using gels. Tungsten has a beautiful quality to it, especially when it's so hot and huge - although I processed these images at 5000 Kelvin, they totally work balanced at 3200. To see more detail on my lighting plan, be sure to check out the LIGHTING section above, or just click HERE. Thanks for visiting :)

Matt


Posted on October 23, 2015 .

CINEMATOGRAPHERS WHO CARE ABOUT SOUND (and a cool Dolby comp!)

A few months back I had finished shooting a short and was dying to see the first edit. When I did lay my eyes on the rough cut, there was no sound (other than a scratch track) and no grading had been done.  Sure, I got to see how well (or not so well) the shots cut together, but the film just felt...well...dead. That might sound a little dramatic but hey,  I'm trying to make a point here ;) Of course beautiful pictures (especially when matched and graded) will look great and do any film a huge justice, but it wasn't until subsequent edits after that when the film had made it's way into the hands of our wonderful sound recordist and sound designer, Glenn Talyor that I really got excited!  

Not only does Glenn record perfect sound, every single time, but he also offers post production services where he works on those recordings and dare I say "grades" them hehe. Upon watching and LISTENING to the latest edit, I was gobsmacked by how ALIVE and engaging the film had become. Not only where the actors voices crisp and clear, but the ambient sounds and music bed behind them were so well refined  and balanced that it took me a second watch to really focus, appreciate and take them in. In other words, the sound design was so perfect that all it did was make my visuals look amazing...hehe ;) And of course, complete the film.  It's common knowledge that sound is an extremely important component to any film right? Sure, but just HOW important it is never really hit me until that viewing session. It scares me to think that film makers out there don't seem to have the same appreciation for sound, and often find out when it's too late (this has happened on a few films I've worked on....it's awful!).

This new found inspiration got me thinking about the power of sound and its ability to compliment a visual story - or more specifically, how it can COMPLETE a story. In fact, it's such an awesome story telling device, that it can work just as well, on it's own :)

Above is an audio design that I created, recording my own voice and adding/editing/mixing in sound effects to enhance the story. The music is from the game Max Payne, and so is the script (although I just read parts that I liked, completely out of order).

Recording quality sound on set is one thing, but don't forget the power of post! (Sound's like something I'd say regarding a colour grade hehe).

On a side note, you'll very rarely, if ever, see me post any external links on my site, or advertise anything.  This is by design of course, because I for one HATE adds. I also like original content and struggle to find it on the internets. That being said, Dolby are currently running a competition which "sounds" really good! With only a week to go, I thought it might be something of interest to people out there since the prizes are great and I'm all about promotion of good sound these days :) Finally, the competition has been EXTENDED TO THE 31st of OCTOBER this year, so there's not long to go!

What are you experiences with sound? Do you have a good relationship with your sound department? I for one feel like I'm doing only half of my job if I don't actually collaborate with people like Glenn. He's also a guy you'll never see without a smile on face...maybe that's because he gets to listen to the conversations on set even when he's seemingly not listening hehe ;) 

Posted on September 23, 2015 .

ALL THIS FOR ONE FRAME (but it's worth it)

Over the past several months I have been shooting, grading and now finishing the TV pilot 'Make Or Break', Written and Directed by Thomas Petrakos. Working with Tom has been both super enjoyable but also challenging - challenging because he always wanted to best possible result, no matter what. This of course is how I live! Always striving for the best possible result, with whatever I have to work with....and often that means no time, limited gear and limited coffee. That being said, I would work with Tom again and again and really enjoyed collaborating with him :) The REAL challenge came with not only achieving a certain level of quality, but also arriving at place that we were BOTH happy with. This of course is what true collaboration is all about and something I constantly work on.

When talking about results, I often look at an image and think about how much work went into it. Sure, if you're shooting with a vintage 85mm wide open, have some beautiful afternoon sun as a back-light, a natural reflector filling in your subjects shadows...throw in some lens flair, a slight breeze blowing the hair and BOOM! You've got an image that looks a million dollars. Instagram that shit, get your likes and feel good about being able to capture attractive, professional looking imagery. BUT! What happens when there is no sun, no reflectors, no flairs, no wind and no magical moment. What do you do then? You gotta up your game and learn how to create magic yourself (not something I claim I know how to do! But I feel like I'm on the right track).

Once we had finished shooting the Pilot, we then had the challenge of creating promotional material. For me, this meant shooting images for a Make Or Break poster. You may have seen the lighting diagram I created for this shoot in previous blog posts, but I wanted to elaborate more this time round :) The amount of work that goes into a single, still frame is well, a lot. Photography obviously shares a lot with Cinematography, but there are some fundamental differences - the obvious being that cinematography is associated with images that reveal information over time through sound and movement, guiding the viewer through a story. Photography on the other hand has less direction and allows the viewer to discover information at their own pace, creating a story based on what they see in their mind.  For me, that basically means that with photography, EVERY SINGLE PIXEL needs to be considered, especially when it's a studio shoot like this one. 

After deciding on a look (in-line with the Pilot's genre which is Comedy/Drama), we decided to shoot the actors on a white background in a studio. Sounds simple enough, right? Sure! And although it all ran pretty smoothly, it took a lot of hands, minds and hours to make this happen. 

LIGHTING

Normally with a shoot like this, photographers use strobes. This makes perfect sense! Strobes (big studio flash lights), are low power drawing, high output, daylight balanced lights that can easily be modified and adjusted to taste. Because they only "flash" when required, they aren't continuously "on", creating heat and drawing lots of power like film lights. That being said...I don't have experience with strobes, so I stick to what I know...continuous lighting. Although necessary for film work, continuous light sources like HMI's, LED's, KINO Flows and Tungsten lamps are not efficient when it comes to power draw and like I've mentioned before, get hot. That doesn't mean you can't shoot photography with them, not at all :) 

Above is the setup (safety second?), which took me a good three hours to perfect on the day (and about a decade to learn how to create in the first place). It might look like I've literally thrown a bunch of lights into a corner, but each one of these lights has been meticulously place and modified to achieve a certain look. Rigging those over-head LED's was not easy either hehe...thanks to my gaffer Glen Cook for making this happen :)

Shot_20_StudioPosterb.jpg

The diagram above describes in more detail which lights I used and camera settings I had, etc. As you can see, we're pulling a fair whack of power with the 2 x 1.2K HMI's in the back, let alone the industrial fan in the front hehe. This same level of exposure could have been achieved with MUCH less power and I could have shot at a much lower ISO if I used strobes. The thing is though, we were on a budget (and who is isn't?), already had the lights hired for the pilot shoot (although one of the HMI's is mine), and we could only afford a bare bones studio to shoot what we needed. Regarding this setup, I have been asked "why did you shoot such high ISO?", and the simple answer is that it's the ISO I needed for decent exposure at f4. At a glance, you'd think light levels would be through the roof with this setup, but once you diffuse and modify, stop down your iris and shoot at 1/100th, you're not left with much.

POST PRODUCTION

In the world of stills, Davinci Resolve is not your tool of choice...and for me, it's not LightRoom either (shudder). Photoshop on the other hand allows anyone with a creative vision to BASICALLY do anything you like to an image. It's amazing! Especially if you shoot RAW.

My usual workflow on a shoot like this is to go through the hundreds of shots and choose a handful that might work. From there, it's a matter of tweaking the RAW settings of the image, ready for 'shopping ;) Below you'll see what I've done with this image of talented actress Rosie Noon beginning in RAW and ending with a cutout. 

After I'm happy with the RAW processing, I then start looking at what features can be enhanced in the image. I refine things like contrast, making blacks black, warming and smoothing skin tones, soften highlights (sometimes adding a glow to them), repainting lips, brightening eyes and generally just cleaning up the image. On top of that, I also have to cut out the model from the background, which can be tedious when you get the hair, let me tell you! Not all of those editing adjustments are present below because I've flattened layers along the way, but you get the idea.

I spent about 6 hours in total on this image. Probably a little excessive I know (and definitely not a cost effective way to go about things), but you need to remember that part of that time is me experimenting and exploring what I actually want to change. If knew that from the beginning, and knew exactly what the outcome was supposed to be before I started, I'd be able to finish the job in 2. Needless to say, now that I look at it this closely again, I want to change and enhance even more hehe ;)

We are now in the final stages of putting the poster together (the top banner image is not the final result). My strong point was never design, so I'm struggling with things like title placement and text but it's getting there slowly. 

So, I hope you enjoyed this quick summary about what was involved to capture and edit ONE single frame :) In summary, here's what was involved:

Studio Hire (white backdrop, decent power, fan, change room and makeup room)

Equipment (Camera, Lighting, Light Modifiers, Laptop)

Crew (Director, Photographer, Camera Assistant, Gaffer, Hair & Makeup Artist, Talent)

The Shoot (1 x 10hr day)

Post (1 week with multiple changes and design evaluation)

All in all, it's a massive amount of resources for a few shots. Short films have been made with less....but hey. For me, this sort of care and commitment to something is what draws me to people like Tom and our crew. Priority no. 1 is to make the best possible imagery we can. Speaking of crew, not once have I mentioned or given credit to the people that helped make this photo shoot possible! So remember that it doesn't matter how good your lighting is or Photshop skills are, you need to surround yourself with talented people who actually give a damn about the final result :) A HUGE shout out to Maryana for her beautiful hair and makeup, a big up to Glen Cook for helping me rig this show, and my wonderful AC in the studio, Jessa Rose :) Let's not forget Tom, who without, none of this would have happened! You're a legend mate...we're almost there! 

How are your Photoshop skills? Do you enjoy photography as well as cinematography? I love both, and often find myself missing one while I spend time on the other. Along with Davinci Resolve tutorials, would you guys be interested in Photoshop tutorials? I know plenty of cool tricks and can show you my exact workflow if the demand is there. In any case, thanks for visiting! 


Posted on August 12, 2015 .

CINE SUMMIT - Join me there :)

THE EVENT IS LIVE RIGHT NOW :) Click here to watch it > CineSummit LIVE

A few months ago, Aviv Avana (founder of the Cine Summit) contacted me and asked me if I would like to be a part of his event, as a speaker! He said that he really admired my work and thought it would be great to have an "up-and-comer" as part of the line-up (some of those guys are A-list Hollywood DOP...wowsers!). 

I've spoken at several cinematography events in the past, have been flown around the world to run private workshops and of course, I contribute as often as I can to this blog. I don't believe in secret sauce or holding back any knowledge in order to better my position in the industry. I believe in the opposite. So, of COURSE I wanted to be part of the Cine Summit! It's free!! 

Just in case you weren't already aware, in less than 48 hours from now you can tune into this awesome, FREE event. I'm one of the 9 cinematographers,  speaking about my experiences and sharing my tips on using low budget gear and how to get a "high budget" look.  Some of the other 8 speakers are out of this world (and are WELL out of my league in terms of experience and know-how)...so I'll be tuning in myself and ready to learn some serious stuff!! 

Hope to see you there :)

Matt


Posted on June 22, 2015 .

THE SONY F55 & MY FIRST ANAMORPHIC EXPERIENCE

I've been shooting with RED pretty much exclusively for more than three years now, but when I pre-ordered my RED Scarlet-X back when it was released, it was THE ONLY affordable RAW recording cinema camera on the market. The one reason I put down more money than I actually had was for 16-bit RAW moving images...not 4K (or let's be honest, 3.2K)...not because red-fan-boys told me to and certainly not because I wanted brand recognition.  I still love my RED and I'm still trying to master the thing! But I never planned on being a "RED SHOOTER"...the plan was, and still is, to create images that express what I can't say. It's a wonderful thing :) 

In the past few years, more and more camera companies have been motivated to produce cameras that deliver similar specs, and this is exciting :) Although, the first chance I've had to shoot anything other than RED, in RAW mode didn't come until Magic Lantern hacked the 5D Mark II (amazing!)...but then recently, the opportunity to play with a Sony F55 came up when Grass Valley asked me to shoot some content for the NAB Show in Vegas. With 3 days and no notice, a tiny, tiny budget (after camera & lens rental I had enough for a tennis racket, a ball, some food and transport) and no idea what to shoot....I began brain-storming, but specifically brainstorming how I could make the most of the camera and it's capabilities.

THE CAMERA

Let's take a brief look at the cameras specs for a second, because as much as I hate "this camera is better than that camera" debates, there really are some great things about the Sony that attracted me to it, and motivated me to shoot slow motion specifically- things that RED (and I'm talking RED Epic-X in this case) just doesn't quite deliver.

When it comes to latitude, detail and bit depth, the RED Epic-X and Sony F55 are pretty close. Close enough not to worry about, as far as I'm concerned. I know I can get beautiful images from both cameras but let's look at some of the things the Sony address's when comparing it to a RED Epic-X, especially since the content I chose to shoot for NAB was slow motion, and my camera options weren't huge considering I didn't want to shoot anything higher than 300fps (this time round).

Sensor Windowing 

This by far is my biggest annoyance with RED. Even when I put my deposit down for the camera years ago, I remember thinking "Man, I won't even need to worry about shooting 4K. 2K is plenty enough! This camera is gonna be freaking awesome!". And no doubt, the camera is awesome, but the way it records different resolutions is not. When you switch resolutions on a RED, any RED, it literally crops the image to record a smaller portion of the sensor. This sucks for many reasons....larger noise pattern, less resolution and detail, and let's not forget that literal CROP! For example, a 50mm lens shooting at 2K on a RED Scarlet-X (or RED Epic-X) see's the same field of view (roughly) as a 173mm lens!! That's a crop factor of 3.46x!!! And sure, it is POSSIBLE to shoot with such a crazy crop, but let's not forget the other more significant pitfalls - larger noise patters (like seriously....much larger) and less detail (like seriously, way less detail).

The Sony on the other hand has the option to either crop in like the RED (which can be useful for extra reach), or down-sample (in camera) the full resolution image to 2K. The crop factor doesn't change, noise patterns are now SMALLER and detail is now SHARPER...plus...there's the ability to record more frames per second...10-times more in fact :)

Rolling Shutter   

Although RED came up with the motion mount, which is an ingenious invention, their sensors do suffer from rolling shutter - although be it quite minimal, it's still noticeable when shooting hand held on a long-ish lens or when strobes go off in frame (camera flash for example). The Sony on the other hand, uses a global shutter, so you don't get these artefacts. Just another thing I don't have to worry about! 

ND Filters

Shooting with quality ND filers is definitely something I encourage and I myself have spent stupid amounts of money on a set of Schneider 4x4's for my own kit. But sometimes, having to change ND can be a pain....especially when your camera is wrapped in plastic, you don't have an AC around and it's raining... 

For times like that, the Sony just wins because it has ND filters BUILT INTO the camera, as standard. I utilized that feature on the day when brief moments of sun popped through the rain clouds. It was great :)

Okay, so enough RED bashing for one blog post. My biggest problem with the Sony was the post workflow. Their RAW processing software is LAME compared to REDCine-X Pro and their RAW codec (although thick and beautiful) is SO DAMN HUUUUUGE. I think compression is 3:1 (which cannot be changed) and the resulting file sizes are ridiculous. Also, with RED I love how in REDCine-X Pro you can "trim" the RAW files into smaller RAW files. I couldn't find an option to do that with the Sony clips. It would be great to be able to share some RAW clips on the blog from this shoot, but some of them are 65GB! Crazy! So instead, I've made the hero shot available in 2K, 10-bit uncompressed YUV...click on the DOWNLOADS section above and have a play :) 

So! after researching the Sony F55 and learning as much as I could on-line about how to operate the beast (thanks to Magnanimous Media [video HERE] and this dude [video HERE] :) I learned that I could shoot 240FPS without windowing the sensor, RAW. This got me super excited! But what the hell was I going to shoot!? I had no money and no time and I really wanted to maximise these few days and get some awesome footage. The problem for me though, is that when I think slow motion, I think of how many LAME videos I see on-line where people shoot slow motion stuff.....and yeah, it looks good, but only because it's slow. I don't want to shoot good footage, I want to shoot AWESOME footage. Now, that is subjective of course, and for me to declare that my own footage is awesome must make me sound like a complete dick...but hey, I'm okay with that. As far as I'm concerned I got ONE awesome shot (maybe two), but I certainly couldn't have done it without the help from my lovely Mum (Karen Scott) who secured the locations and helped with everything else, AND, the talent in front of the lens, Simmone Duckmanton. On the day of shooting it was cold and raining - then we got the hose out and made it colder and rainier. Simmone didn't complain once, even though her lips were blue and her hands were shaking. Although she wasn't the best tennis player in the world, she nailed the brief :)     

So, mum organised (in one hour) the perfect location. A tennis court with a hose, a change room and a heater. I drove like a maniac to get there on time, first stopping off at K-Mart to get the bat and balls. Even though it was raining, I felt that the REAL rain just wasn't dramatic enough - I wanted BIGGER droplets and more of them. The correct wobble and angle of that garden hose wasn't easy to master! But the results were worth the effort. 

Did I mention that I had the luxury of shooting on some of the most beautiful glass in existence? 

Anamorphic Mode ON! 

Shooting on the Sony F55 in "ANA" (anamorphic) mode, means that the camera will record the full projection of light from the lens onto a 16x9 sensor. Then for viewing purposes it de-squeezes that image to correct the distortion so that you can view it correctly. The result is an image (as you would expect from 2x anamorphic lenses) that is twice the width of a 16x9 image. Imagine trying to focus pull/frame (with all that negative space) when looking through your viewfinder and seeing this! (see recording window above). I managed to get most of what I wanted in focus, but I had no idea if I was actually in or out until I got back to the edit suite.

Other camera's (like the Arri Alexa PLUSSony F65 and just recently the Panasonic Gh4) have 4x3 Anamorphic recoding mode options. This mode really makes the most of 2x Anamorphic lenses because then you're not having to crop the sides off after the de-squeeze - meaning you get to keep the maximum resolution for 2.4:1 Scope. The other alternative I had (well, not really) was to shoot with 1.3x Anamorphic lenses. This would have squeezed the image less, meaning I wouldn't have had to de-squeeze it as much, and wouldn't have had to crop the sides off. 

ANYWAY!

So what's the point of all this squeezing and de-squeezing? Why not just shoot with normal/spherical lenses and crop the top and bottom of the frame off in post? Well, you can do that! But the result is quite different. Even though the aspect ratio ends up being the same, the "look" is very different.

The way I like to describe it is to think of a wide shot that requires a 16mm Spherical lens. Now, image using a 35mm lens but getting the same shot, without moving the camera! That's exactly what 2x Anamorphic lenses allow you to do. It's awesome! So, now that your 16mm shot is using a 35mm ANA lens, you've got less distortion, shallower depth of field*, larger bokeh and if the camera moves, more parallax.

*technically, depth of field does not change with focal length, but that's another blog post!

Another way to describe it is imagine you could use TWO 35mm Spherical lenses, side by side, doubling your field of view! That's essentially what's heppening with 2x Anamorphic glass. Below I've photoshoped two single shots together, to give you an idea of what I'm trying to explain. This example is quite wrong though, because the lenses are already anamorphic to begin with, but hopefully you get the idea. 

Also when shooting anamorphic, you may notice that out-of-focus areas of the frame reveal oval shaped bokeh. This is awesome - maybe because it's not what we're used to? I don't know, but it's not just that. There's some sort of magic going on there...it's hard to explain why it's so pleasing to look at (but not focus on) hehe ;) And finally, LENS FLARES! I didn't get to play with them this time round, but typically wider anamorphic lenses exhibit a streaky horizontal flair like the one below (Logan's Run).   

Everyone's searching for that "cinematic" look, and for the most part I'd say the lens has little to do with it. However, the anamorphic look is definitely associated with cinema and has been for a long time. Check out this guys awesome study on the history of Scope (thanks to Ryan Thomas for the link) THE COMPLETE HISTORY OF CINEMA SCOPE.

It's all very confusing but all very exciting. Exciting because I've been wanting to shoot anamorphic ever since I created the cinematography break-down of Inglourious Basterds (that's not a typo), where a lot of that film was shot anamorphic. This technique of shooting is slowly but surely becoming affordable...that's right, we haven't spoken about the cost of these lenses or where they came from yet. In fact, the entire camerea kit and lens kit was lent to me for the three days by the wonderful team at Lemac Film & Digital (www.lemac.com.au), where Brett Dwyer really looked after me. I was lucky enough to take the whole kit too!! (32, 40, 50, 75, 100) - not to mention any and all of the extra kit I required to rig the camera. The service at Lemac is excellent. Brett himself is extremely knowledgeable (much more than I am), super friendly and although it was a sad day returning it all, my experience with Lemac was one to remember :) I should also mention the huge favours and support I got from the guys at Corsair Solutions too (particularly Mark Lampard)...this shoot wouldn't have happened without him :)  

As for the cost of just ONE of the lenses, I'm finding it difficult to locate an exact "new" price, but I've been told anywhere from AUD$20K-$30K...EACH! Holly shit. Talk about exclusive. Thankfully rental houses like Lemac have them at affordable rates, so all is not lost :) In the mean time, I'm looking at THESE!

Okay, so my short time with this camera & lens package got me thinking about framing and making the most of the "wide screen". Just looking through the view finder made me question my own compositions..."how else could I use this frame" is what I kept thinking. I really keen to see how I can use this aspect ratio more effectively to tell stories. I want to move the camera less and learn more about blocking effectively. Ryan Thomas and I are working on that exact thing right now actually, with one day left of shooting for his next short "Next Door's Mail"...no ana and no f55 on this one though, but still, we're excited :)

Anyway, here's an edit I put together today with the best of the clips I got. This was surely not intended...in fact, I was literally just trying to capture a bunch of cool shots in the short amount of time that I had, but, it could almost pass as an ad for something, right? ;) I also briefly show you the breakdown of how I coloured the hero shot. I might make a tutorial for this one...if I get time.

There's a full lighting breakdown for this shot too, at the LIGHTING section above :) Or just click HERE. Thanks for visiting!   


Posted on April 24, 2015 .

STEADY CAMERAS (the evolving composition)

Ever had an amazing idea for a Steadicam shot? It's simple right? If you want smooth flowing camera movement that covers more ground and is more flexible than a dolly, you just bang your camera on a Steadicam and away you go! If only it were that simple hehe :) Keeping in mind that as I type this, technology is quickly catching up to that possibility. Simple, AFFORDABLE, smooth, flexible camera movement is coming and I'm damn well excited :) (Gimbal stabalizing technology built onto the sensor for example)

ANYWAY!

My obsession with moving the camera started when I first got my 5D Mark II and the Glidecam Pro 4000, back in 2009. Just like most film-makers out there, I wanted to do all the cool shit Hollywood was doing without the cool gear that Hollywood had to do it! Slow pushes, sweeping arcs, cranes and tracking shots that covered some serious ground...but where was my chapman dolly, steady tracks, techno cane and motorized head? Not in my grasp is where. So, after building a couple of dollys that ultimately, didn't really work, I decided to (dare I say) MASTER the Glidecam. The clip below is collection of shots that I captured on my adventures about 5 years ago over the course of a years worth of practice, that's right, a year of trying different weights, different lengths, different lenses, different drop times, different walking styles and also, a year of pushups hehe ;) 

Then I got bored with slow controlled movement and decided to make a clip where I literally RAN with the Glidecam >>>


The art of flying Steadicam is definitely something that not only requires a a good sense of composition but also a massive amount of technical knowledge, patience, strength and most importantly, a MASSIVE amount of practice time. Jo Simon put out a nice tutorial to get you started, check it out HERE :)

Several years later, I purchased my very own RED Scarlet-X. I think my very first blog post talks about those days actually...but suffice to say, the convenient days of DSLR shooting were about to change for me, at the time, in favor of High Dynamic Range, High Bit Depth, RAW video recording. This all came at a cost though......WEIGHT. 

A V-Lock battery that lasts longer than 40 minutes weighs almost double what a 5DII does. Put that on the back of a camera like the RED Scarlet-X, plus a matte-box, remote follow focus, monitor and let's not forget, lens, and you're stepping into "I'm gonna need a much bigger rig to fly this thing" territory. With the added weight comes added bulk and serious limitations to flexible movement. What once was literally a few kilos and a one arm job (don't go there), I now had to invest time and money into a bigger rig.

Thinking that I could just plonk my Red Scarlet-X onto the Glidecam was a bit ambitious hehe...so after literally trying to fly it without a vest, I in"vest"ed in the Glidecam-X10 arm kit to go with my pre-existing Glidecam 4000 Pro. This was going to help with the weight. Even then it wasn't really a compatible system but I did manage to get some fairly decent results. 

I've written about my experiences with the Glidecam and Red Scarlet-X in greater detail HERE if you're interested. It covers issues that I had powering the camera, monitoring, etc. Eventually though, I decided that I needed something more stable, easier to fly and with power/monitoring options already built in.

And then came along eBay :) I got rid of the Glidecam X-10 and picked up the CAME steadicam for just over a grand, delivered! Here's a link to it > CAME STEADICAM

After playing with the rig for a about a week, I began to get a good feeling for it. It was totally different to flying a single human arm, no vest Glidecam, although the principals were the same. The camera is just SO much heavier and responds differently to a DSLR. The CAME Steadicam is amazing and for the price, it solved all of my immediate struggles with flying the Scarlet :) Don't get me wrong, it's no REAL Steadicam replacement. In other words, yes it's possible to get decent results with it, but things like build quality, adjust-ability, comfort of the vest, ease of balance etc, cannot be compared with that of the Zephyr for example. But then again, you could buy TEN of the CAME Steadicam units (delivered), or ONE of these > STEADICAM ZEPHYR

So, value for money is not something worth debating. In fact, the CAME Steadicam is too cheap not to buy if you're looking at learning how to fly.

So I gradually got better at flying this thing and began offering my services as a "Steadicam Operator" in addition to my cinematography packages. That choice didn't fair well with other true Steadicam Pro's out there but hey, at the end of the day it's always about the final result, and dare I say I've been getting some decent results :)

Here's a few clips from recent films that I DP'd and shot "Steadicam" for, using the CAME unit.

The above shot was something Daniel Pearson and I came up with for his film 'Thrombosis'. It's actually my favorite steadicam shot ever :)  

These shots (out of order and un-graded) were a result of many nights of pre-production with Director Rahul Perry-Prasad for his film 'Some Kind of Beautiful' which excitingly has been accepted to screen at Cannes Short Film Corner! Fucking epic :) So excited for you guys!!

The two above are from a film I shot for director Joseph Russell called 'Queen Of The Bees' which made it to the New York International Film festival! We are super excited for our next film which is currently in the works...a feature length this time, and yes, with lots of steadicam action hehe :) You'll notice in these shots there's a fair bit of micro judder/vibrations. Part of that has to do with my walking/operating (too heavy footed) and the fact that I over-loaded the rig...I was a few kg's over it's 15kg limit.

So, camera movement can add a lot to what normally might not be a very interesting shot. But even if you can fly (and I'm still learning), there's another huge challenge. Lighting. Because your composition is constantly changing and more of your environment is coming into view, it can be really difficult to light your scene without showing the lights themselves! Planning your shot is really important. 


The diagram to the left is what Director Jad Olivier and I came up with after a brief visit to the location for the film Mr. Ghost. As you can see from the final shot though (below), we ended up changing the first bend because it was literally too difficult to hide the lights!

We also ended up scrapping the overhead Kino because the house was super old and we didn't really have safe rigging equipment to get it up there. Instead we moved one of the 2.5K's up above on the stairwell.

Lighting for the film was supposed to be very stylized and although I think we achieved what we were going for, next time I'd soften it up a bit. Also, if you watch closely you can see a lens flair towards the end of the shot....so hard to hide those lights!! 


Since then I've been asked to shoot a lot more steadicam, and with that demand came for even more challenging setups...

If you've never used Shot Designer Pro (phone and tablet app), then you gotta get on it. Much better than a pen and paper, it's fricken awesome. I'll be doing a more in depth post about that later. 

Anyway, the above shot was for the feature film "Chloe Lives" which we only just wrapped for a few weeks ago (hence why I can't show you the result just yet). Notice how there are no lighting icons in the diagram? That's because there was literally NO WHERE I could place lights! Luckily it was fairly "lit" already with practicals, and the constant movement and business of the shot helps hide the fact that maybe it was under-lit ;) The cafe was on the second level of a the building so I couldn't even put lights outside the windows! Lighting aside, the shot was tough. Not so much because of crafty moves (it was relatively simple) but due to the sheer lack of space and the challenges that low budget film-making bring - we had no wireless video for my focus puller/1st AC Kate Tartsus! She was following me throughout the whole shot, as was our sound department hehe...it was chaos! But we got the shot...16 takes later hehe :)

I think it's an awesome thing to be able to offer a Steadicam service, even if you aren't a pro. Just make sure you get the practice hours in and watch that horizon! There's a huge community committed to sharing knowledge about the art of flying Steadicam, so make sure you explore that on your journey. If some fuck-tard tells you "don't bother flying yourself, just hire a pro", kindly ignore them and go about your business, but then again, don't do something stupid like testing your new rig out for a day and then start calling yourself a Steadicam op. I personally have learned a few things "wrong" and they're super hard to un-learn (walking style, monitoring setup, etc). Practice hours, strength and the ability to balance different setups is key, but so is knowing what looks good in a dynamically changing composition.

Also, when discussing shots with your director, make sure you question the use of steadicam. There's nothing more annoying than a director asking for a steadicam shot that doesn't really need to be a steadicam shot. Use this power for good! Use it to reveal environments and draw your viewer in...use it to tell better stories...don't just use it because it's cool.

Wrapping up, I'm sure we can all agree that camera movement, if done right, is just sexy. I'm still learning how to best incorporate that movement in a way that best services a script and it's awesome fun, especially when your director works with you in achieving that goal.

Another film I shot with Jad Olivier, titled 'The Constants', is about to enjoy a festival run. We experimented with some awesome camera movement in that film - below is one of my favorite shots. Can't wait to collaborate with you again mate (and what a crew!) :)

That smooth jib was operated by Brayden Alden, and man what a feat! He skillfully flew the camera above that antique chandelier...it was nerve racking and awesome to watch :) Nice work buddy!! Here's a few BTS shots from the night...

Posted on February 19, 2015 .

VISA SHOOT & THE SONY A7S (risking the hype)

Recently I was contacted by good friend, amazing actor and talented Director Ben Mcnamara about shooting a commercial for VISA..."HELL YEAH!!" was my initial reaction, as I've always wanted to work with Ben on the same side of the camera. Anyway, after reading the brief, studying the mood board and watching the reference clips my "HELL YEAH!!" turned into a subtle "OH SHIT!". Even though VISA are a massive company, there are always budget constraints to consider. In this case we were time poor and restricted to a very small crew...oh....and NO lights.

When discussing what camera we should use, my initial suggestion was to shoot RED, not because I'm a fanboy (seriously, I'm the opposite), but because it's a camera I know very well and work quickly with. Confidently assuring your employer that you can deliver what you say you can deliver is part of the job, but ACTUALLY delivering is far more important. With the Scarlet, I'm well aware of its strengths and weaknesses and I know where it can be pushed...which brings me to why we decided against it.

Let's go back to "NO LIGHTS" for a second. Now, before we get into the whole "low light" camera debate, this really is a situation where the RED would suffer. Don't get me wrong, I've had great success with my Scarlet in low light (Low Light Ignite!) but that was planned, refined and in a controlled environment. This shoot for VISA was the complete opposite - and then some. The sheer amount of shots that were scheduled for the time we had, was crazy, and although the locations were awesome, they varied from full direct sunlight to dark bowling alleys and under-lit cafes...and to top it off, I had to shoot at 50p so my light was cut in half! 

What camera's are available today that can reliably capture quality 1080/50p (no moire or aliasing), record to cheap internal media, support almost any lens type, allow for 1080p out via HDMI whilst recording internally, have the ability to shoot "flat", have a codec that can (although only 8-bit) be pushed around in post, weigh as much as a V-Lock battery, can be mounted on a bike with ease and is light enough to shoot all day without breaking your shoulder....ANNNNND.....shoot in virtually NO light without an issue? Let's not forget the full frame sensor either :) There aren't many. In fact, I could only think of one (Jan 2015).

THE SONY A7S!!!

So after reading that, you might see why I considered this camera over the RED, but my decision had to be backed by confidence which meant testing the thing in person :) Was all the hype true? You bet....but hype aside, there are honest reviews out there that help make decisions like this much easier. Guys like Dave Dugdale are massively helping the community we work in, and I for one really appreciate the time and effort he puts into his reviews, thanks mate!! :) After watching this (Dave's Sony A7S review), I pretty much knew what to expect from the camera, but even then I had to test it for myself before the shoot. A day of Recce with Ben and the camera was enough to seal the deal...this camera is SICK!!

The A7s isn't perfect though...certainly not a RED Scarlet replacement. The codec, although pretty darn good is only 8-bit and if for example you shoot with an incorrect white balance, it falls apart pretty quickly when correcting that in post. For this job though, it was all hand held, supposed to look a little raw (not THAT raw ;) and the grade was being handled by the client who had asked for a flat picture style. I had been given references as to what the final grade would look like and was confident delivering footage like what you see above. I shot the entire thing s-LOG2 (Sony's FLAT picture style) which has a base ISO of 3200. 

3200.

Base.

ISO.

..........huh?

That's right, 3,200 ISO as a BASE. Of all the advantages I could have ask for on a shoot like this, I think that one alone was the deciding factor for me. Just to put things into perspective, a RED Scarlet's "base" ISO (which is still being debated about almost 4 years after it's conception) is either 320, OR 800, depending on which forum god (www.reduser.net) you try and interact with. Regardless, I think you'll see my point that when it comes to sensitivity and image quality, the Sony A7S smashes the RED out of the park when shooting above 800 ISO....how about 12,800 ISO? See below :) 

Did I mention that even though the brief said, NO LIGHTS, I through in 2 of my 1000 LED panels anyway ;) 

Sure, there's no RAW, and the highlights clip quicker, but the above shot would not have been possible to shoot as nicely with a RED, considering the light levels. Even with the two LED's I brought with me (hehe) I had to shoot this at a crazy high ISO to get decent exposure, but how clean is it?!?!?! Unbelievably clean for 12,800 ISO :) Lighting wise I bounced a tungsten LED off a white board on the ground, and another 5600K LED camera left, off of the red curtains. Then it was time to head outside....full sun....

With a shit-tonne of ND and shutter of 1/100th (for the 50p), we were set to shoot in any location! The rig we had was built from a few bits and pieces, crafted by my awesome AC, Kate Tartsus :) Wireless HD video for the client was up 100% of the time and worked flawlessly. With the super packed schedule we had, I don't think it would have been possible (regardless of how awesome this camera performed) without the help of an amazing crew. A big thanks to Kate Tartsus, Kate Murphy, Ben, Bobby, Natalie, Tomas and 1st AD Sean Tu for creating an awesome experience on set! 

Check out the finished clip below...I had nothing to do with post on this one, but I think it come up pretty nice all things considered. It's such a luxury to be able to see your own work so quickly after shoot day - I think the guys at Hub Productions (Marco especially!) had a rough edit done the day after!! All time-laps was done by Ben Mcnamara (nice work mate!)

*** This clip has been compressed 3 times, so not much use for pixel peeping sorry, I don't have the original but was lucky enough to be able to share this :) ***

You might have noticed that not one of those shots was actually played back at 50% speed, so turns out I could have shot at 1/50th 25p which would have looked much nicer, but hey, it's good to have the option and that's what the client asked for :) 

So, is the Sony A7s the ultimate full frame camera? Maybe right now it is.....when it comes to low light performance, it can't be overlooked. The biggest gripes I had with the thing were battery life (can be solved) and lack of RAW, but for $2K....you can't really complain. Full frame, usable 12,800 ISO, LOG modes, over-cranking without compromise, 1.6x crop mode (awesome feature!), support for almost any lens, decent latitude even though 8-bit, surprisingly good built-in viewfinder, full res HDMI out, recordable 4K output via HDMI, decent after-market cages and rigs, cheap media, small enough to go almost anywhere. For certain jobs, considering the price, it's perfect :) Again, it's not a RED replacement, no way, but it does have a place on my camera shelf.  


Posted on February 18, 2015 .

MAKE OR BREAK (#setlife #woddup)

Follow this link to my Vimeo Page for the moving shot: [MTS]Films Vimeo Page

Follow this link to my Vimeo Page for the moving shot: [MTS]Films Vimeo Page

Big budgets, big lights, amazing cameras and gourmet food don't mean SHIT if you're surrounded by people with big egos who don't really seem to be phased about the film we're all working so hard to make. "Let's work as a team and do it my way" can sometimes be the underlying tone of a film-set that pushes me to new levels of tolerance and ultimately leaves me feeling like time has been wasted. Thankfully, this shoot was nothing like that. We've almost finished shooting the pilot for a new Australian TV series "Make or Break" Written and Directed by Thomas Petrakos (A mega friendly and talented bloke). I know I've written about this before, but I continuously find myself happier and more in-line with what I want to do in life when I surround myself with friendly, passionate people who are also striving to do their absolute best and contribute to the art of Film Making, as a TEAM, which is exactly the sort of "setlife" I experienced on Make or Break. 

"Setlife", frequently hash-tagged on Instagram and Twitter,  often shows the glamorous side of the life we film-makers would all like to be living. The exclusivity of being part of a film crew, working with stars and people of note, closing down roads and temporarily shutting down businesses, breaking for meals and eating together like family, marching around with special passes that access restricted areas, playing with guns and blowing up cars, after-parties and red carpets...it's all very intoxicating and exciting. But, there's often another side of "setlife" that isn't so glamorous. For example, imagine working with people from all walks of life who all have different opinions about how things should be done, working with little sleep (sometimes 16 hour days) when sometimes, open and clear communication just simply cannot be achieved, placing everyone under pressure so great that it feels like the world may come to an end (a little dramatic I know). This sort of environment often brings out the worst in people, including me. BUT! With the right people, it can also draw the crew together, turn the cogs of collaboration and result in such a rewarding, fulfilling experience that makes all the struggles worth while. That, is worthy of the #setlife hash-tag. That, is what it's all about! Pulling together, working together and being respectful along the way. Big budgets, big lights, amazing cameras, gourmet food AND a crew of people who work as a team communicating openly and clearly, all pushing their own limits of greatness and creativity to reach a common goal. Does such a world exist? You bet! And I can't wait to be part of it :)

ANYWAY! Russell Brand's book REVOLUTION is starting to rub off on me....better get back to the blog ;) 

The time we had to light this film was scarce, but Tom and 1st AD, Andrew Cruickshank DID let me push the boundaries of schedule and I was able to, by the 5th and last take, tweak my lighting to a level of comfort (I'm rarely happy with my lighting...I could tweak and tweak for hours if I had the time). In fact, the little amount of time we did have was used efficiently thanks to the awesome gaffing team I had with me, Glen Cook and PiDicus Rex :) While I'm mentioning crew, I shouldn't and can't forget my amazing camera crew, Kate Tartsus (1st AC) and Jessa Rose (2nd AC/Data Wrangler). You guys are amazing :)

 Although the film is still in production, Tom has been kind enough to let me share with you a couple of grabs from the film, before it's actual public campaign begins (one moving shot from the cafe too! Thanks mate :)

Check out the LIGHTING section at the top of the page to see diagrams and breakdowns.

We didn't have the budget for a truck full of lights, so we hired a a few HMI's (575w and 1.2K) and backed that up with my small tungsten kit and a couple of LEDs. Granted, I'd wish (all three) for  a massive truck(s) full of the biggest, brightest lights money can buy, along with all the modifiers and gels too, but you certainly don't NEED that stuff, right? It just makes things easier, and I guess, would give you more choices. I've actually never used anything brighter than a 2.5K HMI...so maybe I'm talking out of my ass. I do find myself wanting larger sources the more I shoot though, I guess I'll have to wait for those "big budget" films before I continue writing like I've been there hehe ;)

Anyway, lighting aside, this was the first film that I have ever used Pro-Mist filters. Basically, a Pro-Mist filter is a piece of 4x4 glass this sits in front of the lens, lessens contrast, rolls off highlights and depending on the strength you chose, soaks your image with a soft, pleasing, but barely noticeable glow, WITHOUT reducing sharpness or detail. Recently, I was lucky enough to visit, in person the "B&H Photo and Video" super store, in New York. Here, I spent a good deal of cash on a few pieces of this magical glass and I'm absolutely loving what they do to my highlights. While 1/8th was basically in the matte-box the whole time, I'd sometimes jump for the thicker, denser 1/4 or in some cases, the 1/2 Pro-Mist. When a light source is in frame, it just blooms and cries with beauty...sometimes a little much, but man, I'm loving the varying degrees of halation these filters offer. 

As the film progresses through production and eventually into post, I'll be updating the blog with additional lighting setups from this shoot and talking more about blocking and set design. Thanks Thomas Petrakos for letting me share a couple of frames with the film making community!

If you're interested in learning more about how I light my films (I'm still learning) be sure to check out the LIGHTING section at the top of the page. Here, you'll find other breakdowns from films I've shot and lit in my short career. Thanks for visiting! #goodpeople 

Click on the image above to learn more about how I lit this shot at the LIGHTING section of my website. 

Posted on January 6, 2015 .

A WORLD OF GREEN...[ The Parting Gift ]

ABOVE: Ben Mcnamara, lead actor in The Parting Gift, always bringing his A-Game, which is game changing. He's awesome!

I've shot green screen before, but it's never been this intense or important that I get it right. When Chris contacted me asking if I'd be interested in shooting his next film "The Parting Gift", ENTIRELY on green screen, I jumped at the opportunity with excitement :)

I'll never forget the day that I stumbled across a chroma key tutorial at Creative Cow almost a decade ago, in which (my hero) Andrew Kramer taught me all about spill suppression and how to create a nice key. I shot my very first chroma key test with my brand new (at the time) Sony Z1 and boy did I learn a lot about the importance of compression, chroma sampling and why I need a true progressive camera. Since then I've been required to light and shoot insert shots for various films and music videos over the years, but often they were a static camera where the shot might only last for a few seconds on screen, if that.

Above: A chroma key shot for the music video "Ain't That A Bitch" by Twelve Foot Ninjas

The green screen requirements for The Parting Gift were completely different, and much more challenging. For one, it wasn't just a few seconds, it was an entire film, and two, they weren't just static shots...in fact, Chris was clear from the beginning that every shoot would incorporate some sort of camera movement...dollying, pushing, tracking, booming, you name it! Fortunately, visualizing what Chris wanted was easy because he had already completely animated the entire film in 3D, in addition to the stunning story boards you see here.

Having a super clear picture of what Chris was going for creatively, I then had to make sure that the technical aspects were covered. How much light would be needed to light the chroma key adequately? How much and what sort of light would I need to light the scene and actors? How much space would we need to move and position a 13ft Jimmy jib and a new York taxi?

The space we had wasn't glamorous, but with some clever heads and hands, we knew could make it work (or at least give it a decent crack). A few test shots and it was game on! Once again, Chris' 3D model came in handy because it was actually to scale...so awesome :) Moving and positioning the jib without interfering with the space or casting shadows wasn't easy! Luckily we had the help of talented and technical, Luke Skilbeck (jib owner/operator) and his awesome crew who were able take the lead in that department. The smooth and fluid motion you'll see later below is a result of Luke controlling the jib and sometimes Chris at the front controlling the head.

Lighting the film was a massive challenge. My usual approach is to visit the shooting location, take a look at what light is already there and enhance it while staying true to the tone of the film and the scene at hand. Since there were no locations to visit, and no pre-existing light sources to enhance, I had to really get into a different head space and think about where light would be coming from. Let's not forget that I also had  to light and expose a usable green background behind every shot and on top of that, I had to think about motion tracking markers, parallax issues and depth of field.

My first goal was to sufficiently light the chroma key BG. Our budget was tight, so 4 x 4Bank Kinoflows with daylight balanced tubes would have to do. Lighting for the actors had to be flexible, powerful and preferably daylight balanced (so as to keep noise levels to a minimum). Some scenes were at night, others at sunset and some in the middle of the day.

Lighting kit (hired from LITEMUP in Melbourne)

4 x Kino Flow (daylight balanced tubes) 

2 x 2.5k HMI

2 x 575w HMI

3 x 1000 LED panels (daylight balanced)

2 x 650w Tungsten Fresnels

2 x 300w Tungsten Fresnels

Working with Dan von Czarnecki (best gaffer in the biz) was a pleasure :) With the time pressure we had, Dan's quick, creative and problem solving mind got us over the edge. Dan has gaffed for me a few times now and I highly recommend him :)

I mentioned depth of field a second ago, and for this particular project it was super important. Using a shallow depth of field is a great way to separate foreground and background, helping guide your viewer to where you want them to look. Unfortunately for this shoot I didn't have that luxury because keeping tracking markers relatively sharp was crucial for the tracking software to work.

With the light levels I had the budget for, my exposure would be sitting around f4 at best (taking into account the light loss I had because of the polarizer). On a super 35mm sensor (1.6x crop) rated at 800iso, I was pushing exposure. Normally that doesn't really worry me, but for this shoot I had to keep in mind that the shot wouldn't work if the key wasn't clean. I was often right on the edge....

With all of these challenges at hand, what really made the difference was not only Chris's genius pre-production, but the actors who were able to put themselves in a world that did not yet exist. Eye lines, screen space and reacting to things that weren't there...I was amazed by the talent and professionalism we had on set. I've worked with Ben Macnamara (lead) before, but never in this capacity. What an absolute legend!

Check out a compilation of my favorite shots, pre-keyed....

A private screening for the cast and crew happens later this month and the film will be released publicly, shortly after that :) Stay tuned! We're all very excited :)


Posted on November 13, 2014 .